
This guide will be your compass, leading you through each area, from the Temple Entrance to the Mahavira Hall. I will clearly point out the locations of Treasure Chests, Wisps, and how to deal with the hindering Yaoguai, including Yellowbrow and the Macaque Chief.
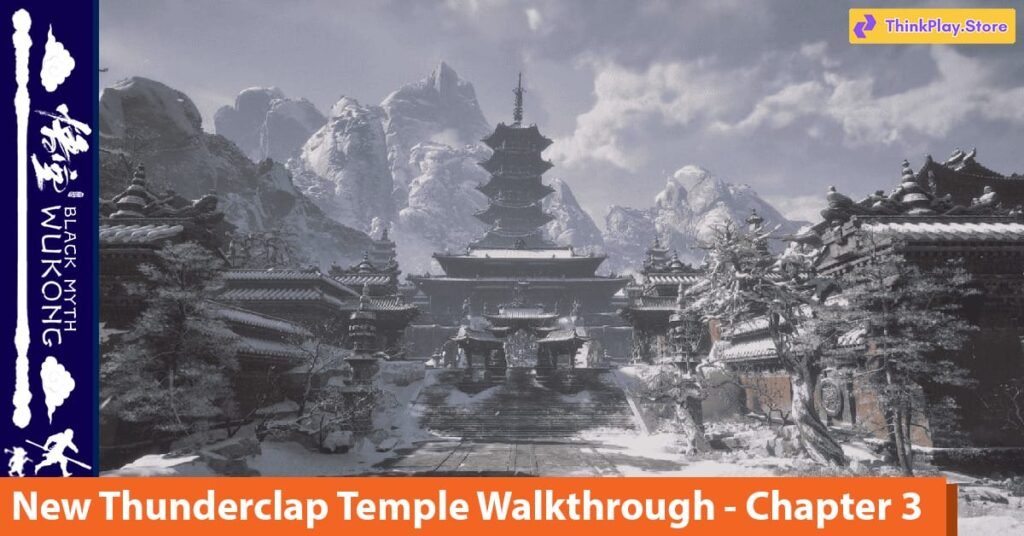
Temple Entrance
The immediate goal is the Temple Main Plaza, but first, let us scout this Temple Entrance area. Groups of Censor Holders roam about, staffs in hand. Their martial arts are mediocre, but do not underestimate them. Alongside them are the slow, bulky yet sturdy Supporter Monks, who primarily attack with their fists and feet. Occasionally, you will encounter the agile Dual-Blade Monks, brandishing their sharp twin blades. Be careful with their continuous slashes, some of them might even drop the Curio – Beast Buddha, but luck is unpredictable.
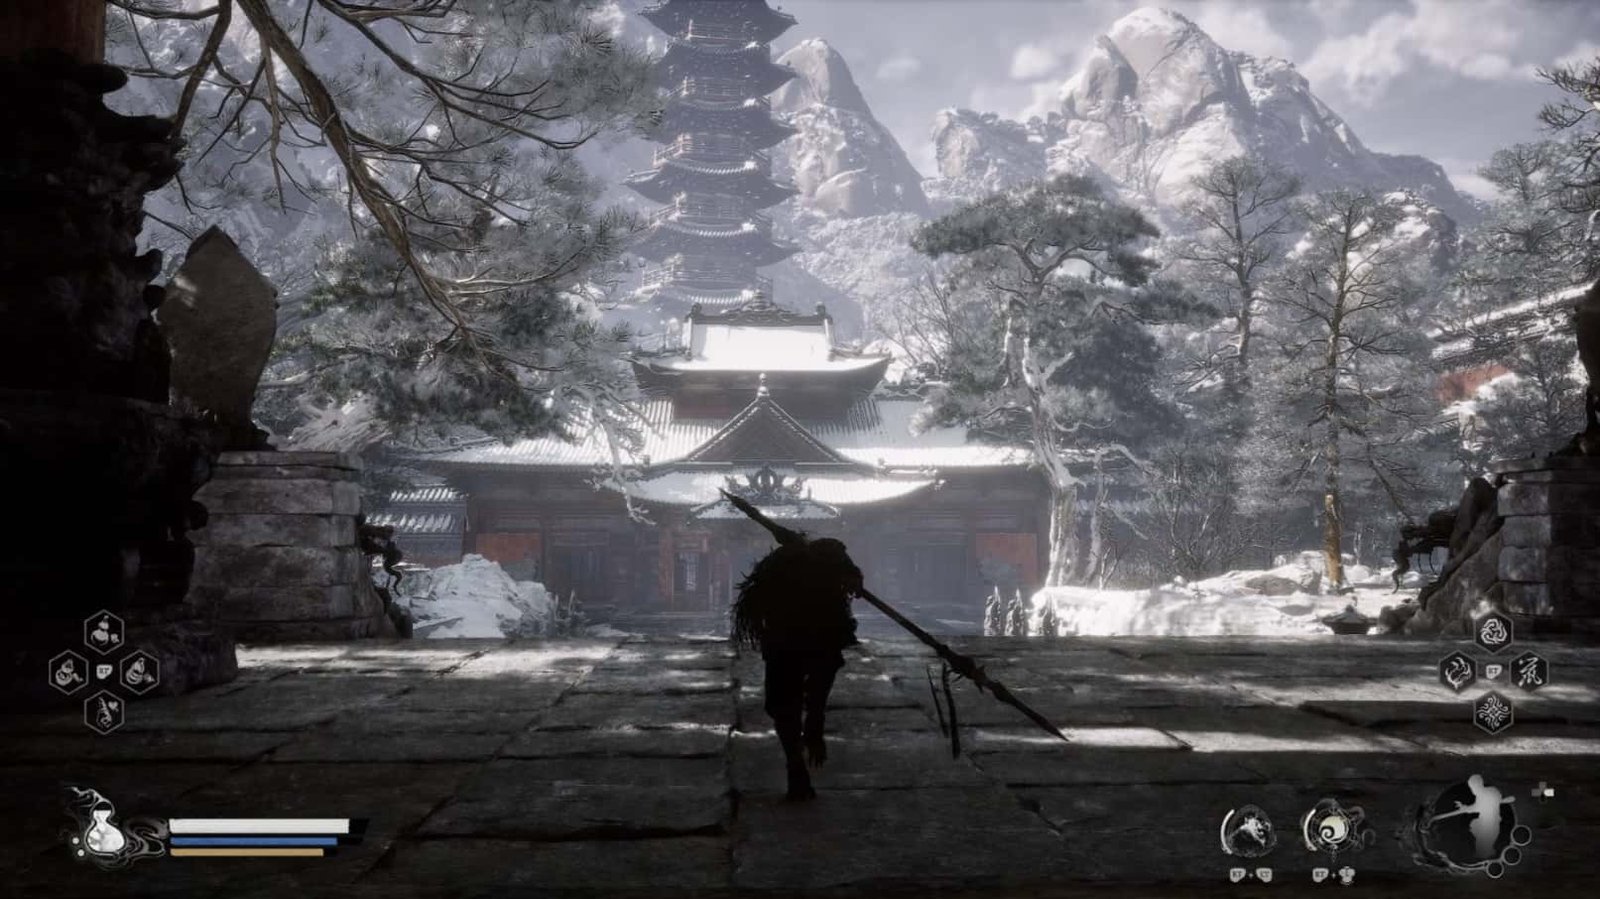
Before venturing deeper, explore the secrets around here. Right after the temple gate, on the right side, near a small altar is Treasure Chest 1, offering you Tiny Piece of Gold x7 and Small Piece of Gold x1.
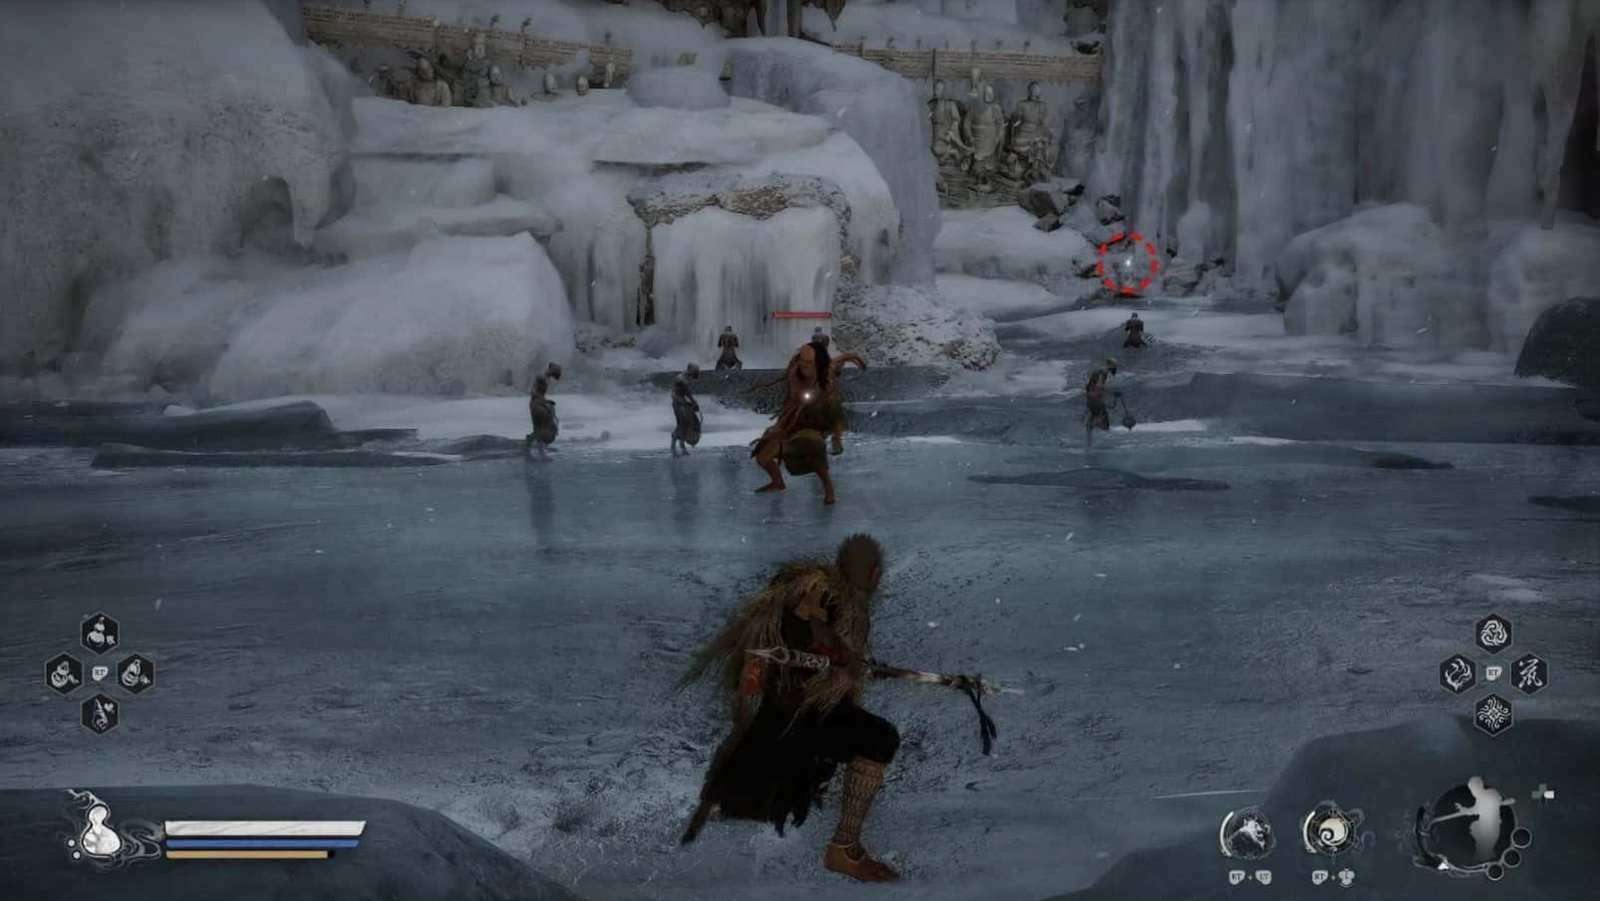
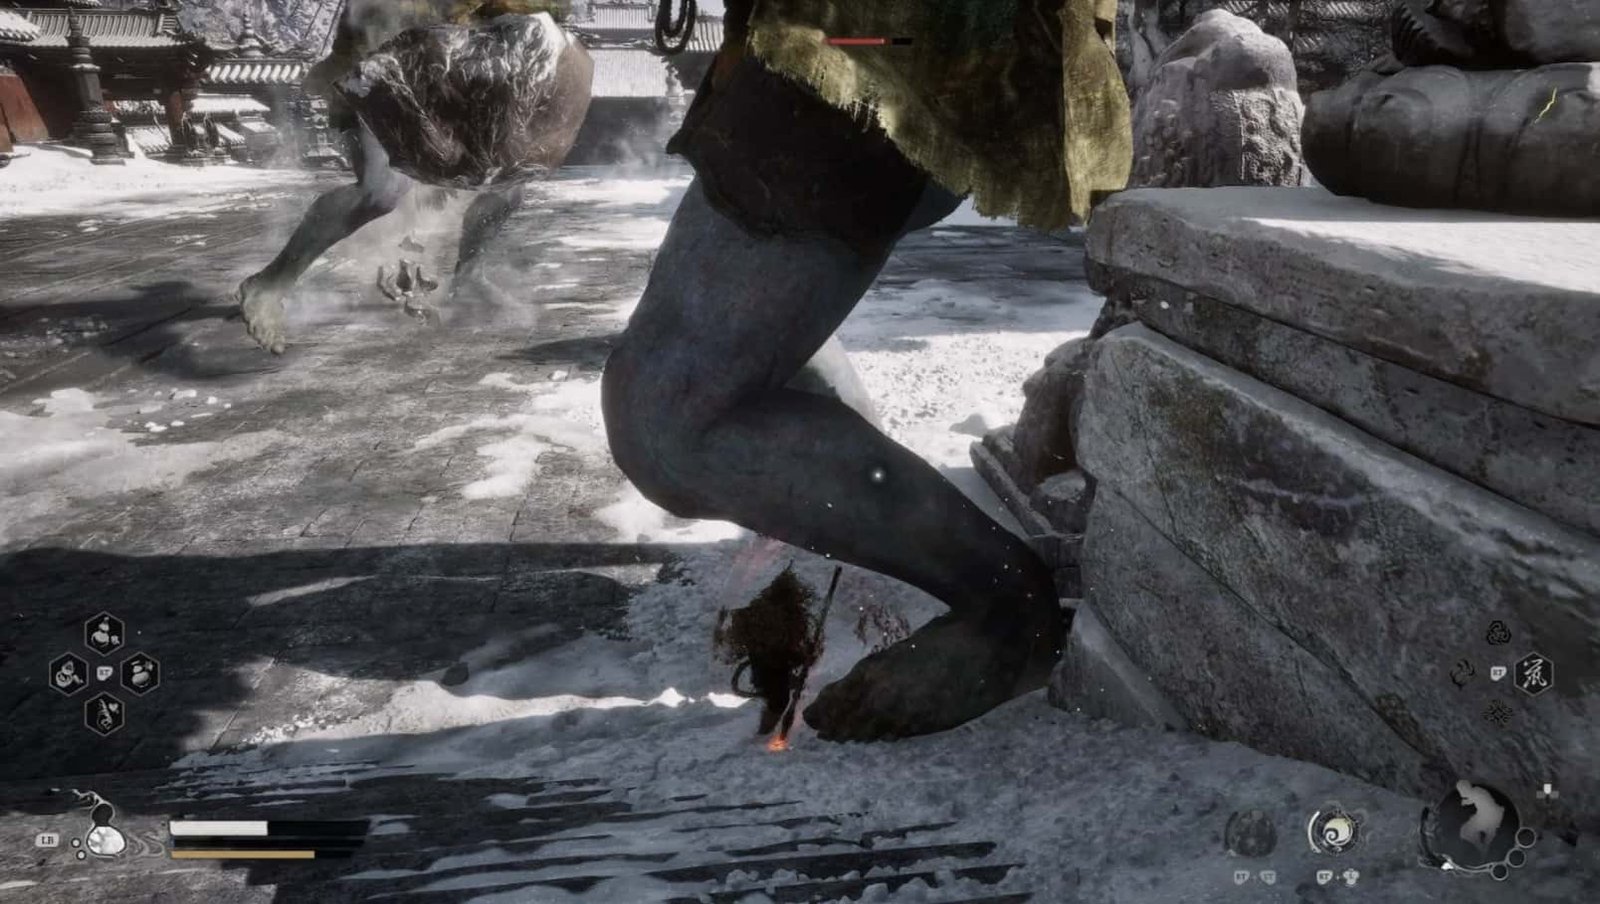
Continuing to the right, you will see a frozen lake, next to a majestic waterfall. Near the statues by the waterfall is Wisp 1, absorb it to increase your inner strength. Be careful, a Sea Monk is lurking nearby.
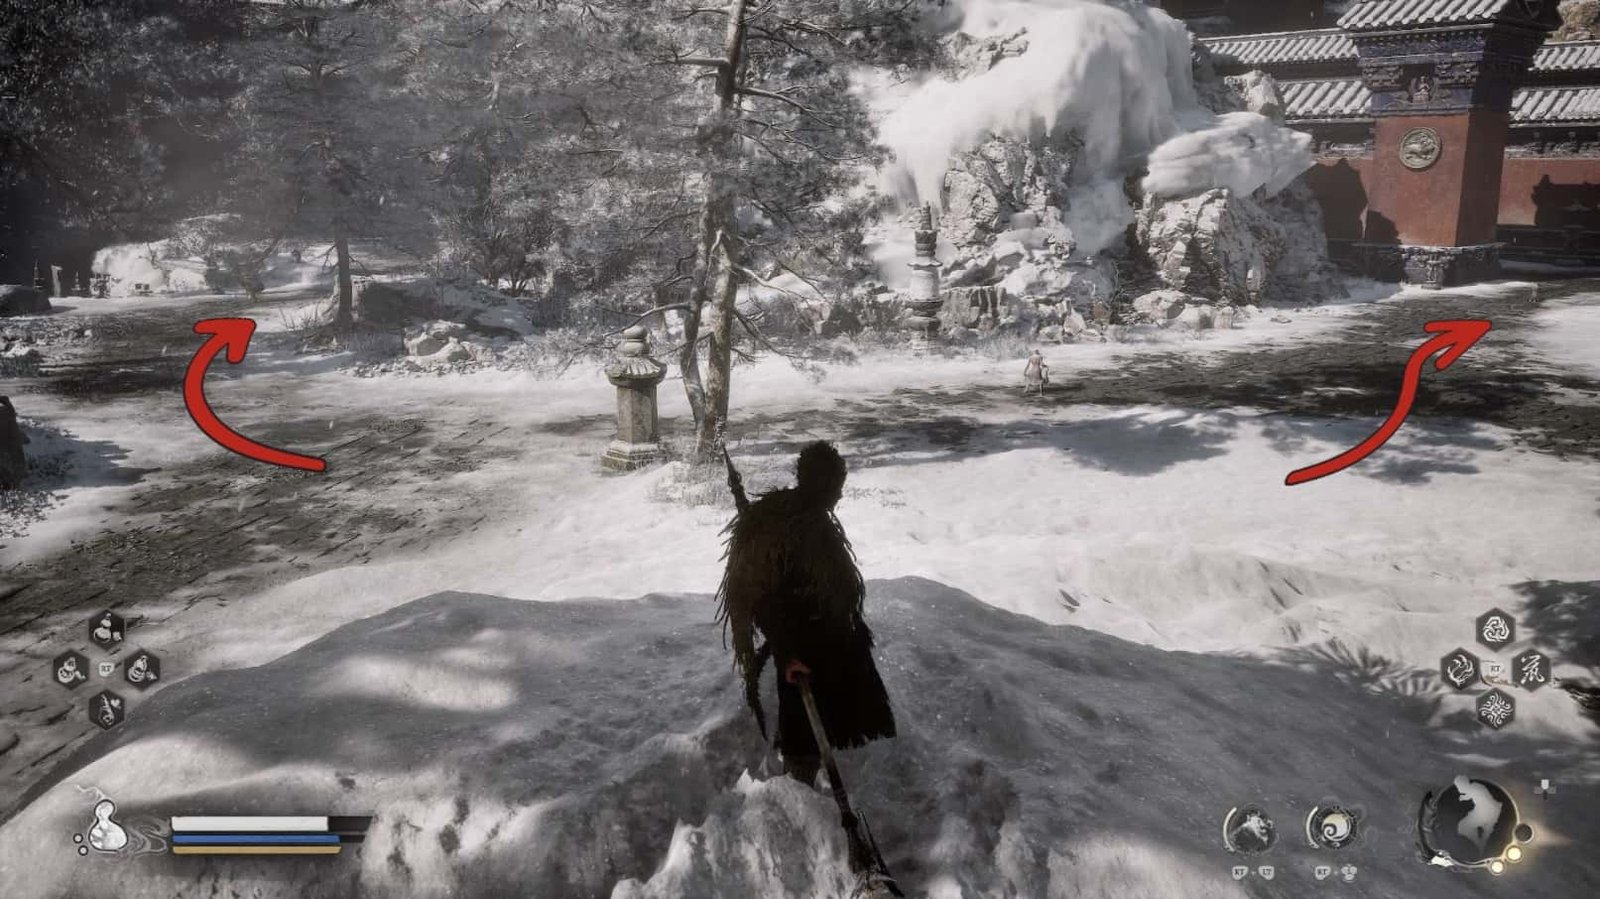
Looking towards the left side of the area, behind a large snowdrift near the gate leading to the optional area, you will find Wisp 2. Continuing to explore, you will see a building in the middle of the area. To the left of this building, on a stone platform, is Treasure Chest 2. Be careful of the Thunder Rhino Master and Overseeing Monk nearby. Opening the chest, you will receive Blood of the Iron Bull, Tiny Piece of Gold x3, and Small Piece of Gold x2.
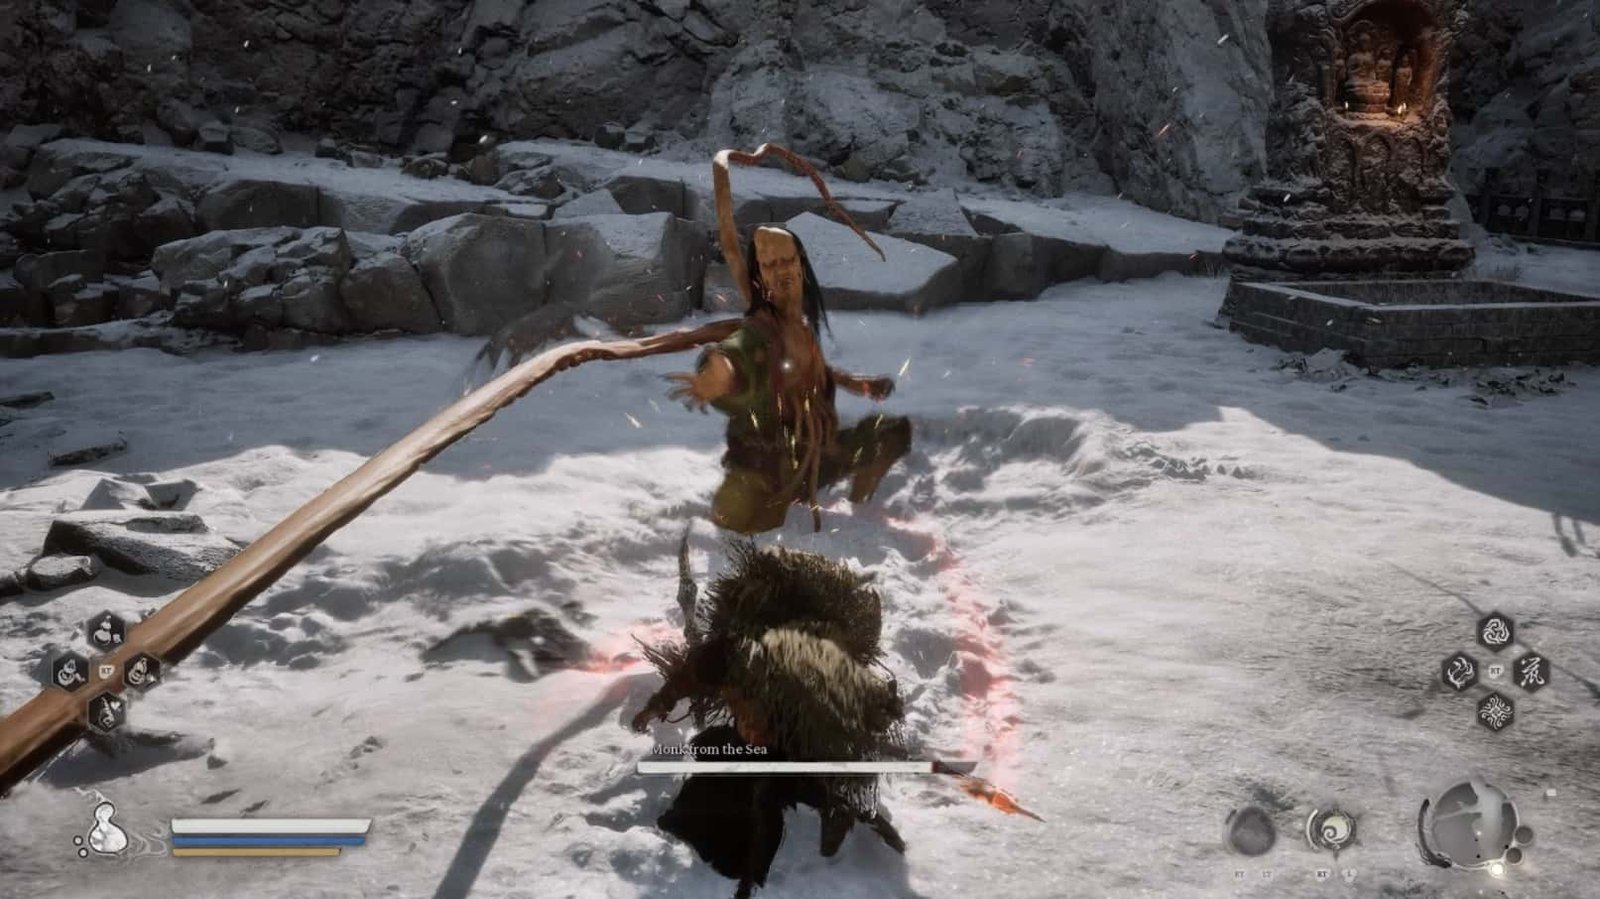
Now, turn to the right from the Shrine. This optional area hides many challenges but also a bounty of rare treasures. Overcoming the Supporter Monks, Censor Holders, and Wolf Guardian, you will face Yaoguai Chief – Monk from the Sea.
This foe is extremely annoying with his ability to create freezing puddles, causing the Hoarfrost effect. Carefully dodge, utilize fast attacks, and use anti-freeze items. Defeating him, you will receive the powerful Spell – Hoarfrost.
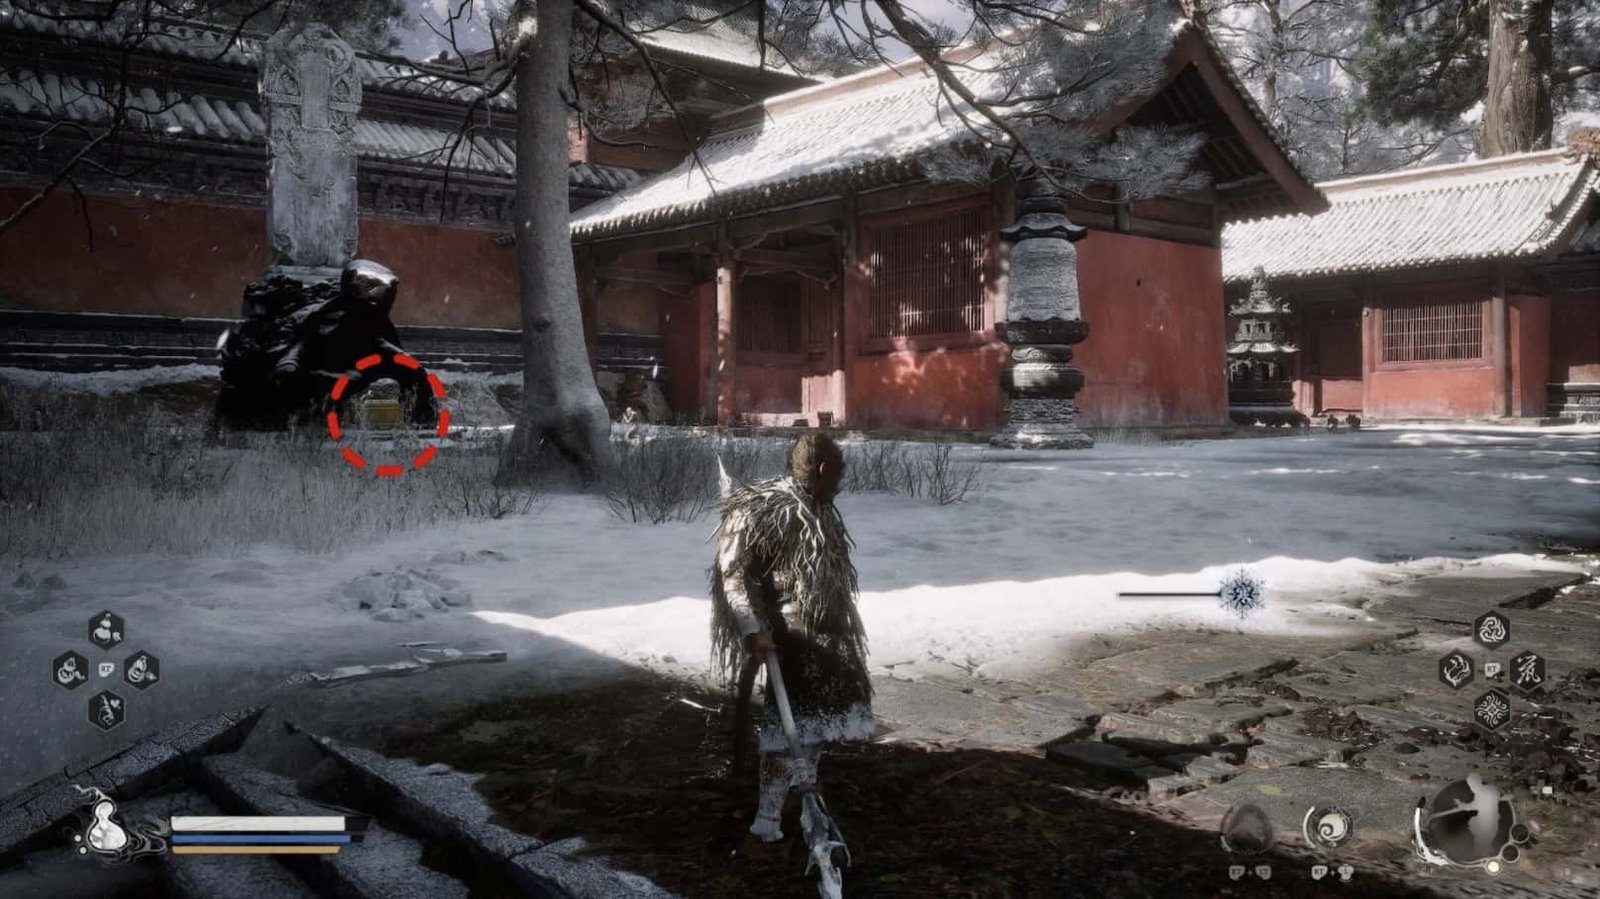
At the foot of the turtle statue in the courtyard, surrounded by Censor Holders, is Treasure Chest 4. Opening the chest, you will receive Blood of the Iron Bull, Knot of Voidness, and Life-Saving Pill x1. On a snowdrift, after defeating a Wolf Guardian, look for Wisp 4. Not far from there, in a small hut next to the path leading to a stall, you will find Soak – Sweet Ice. Use this type of soak when drinking from the Gourd Drink to increase your resistance to frost.
Next, turn to the left from the Shrine. This second optional area is smaller but no less interesting. In the small building to the left of the entrance gate, you will find Wisp 3. And in the small room to the right of the entrance gate is Treasure Chest 3 containing Tiny Piece of Gold x3 and Cold Iron Leaves x2. Finally, in the small garden behind the building to the right of the entrance gate, look for the rare Aged Ginseng/Millenium Ginseng.
After exploring both optional areas, return to the Shrine to recover. Remember, you can bypass some Overseeing Monks if you move stealthily enough, and don’t forget to defeat the Dual-Blade Monks to try your luck at receiving the Curio – Beast Buddha.
Now, heroes, step forward to the Temple Main Plaza! The path ahead is arduous but also full of promise.
Temple Main Plaza
From the Temple Entrance Shrine, following the main path leading into the Temple Main Plaza, a vast and majestic square appears. The blanket of white snow enhances the solemnity but also the frigid atmosphere, signaling the challenges that await.
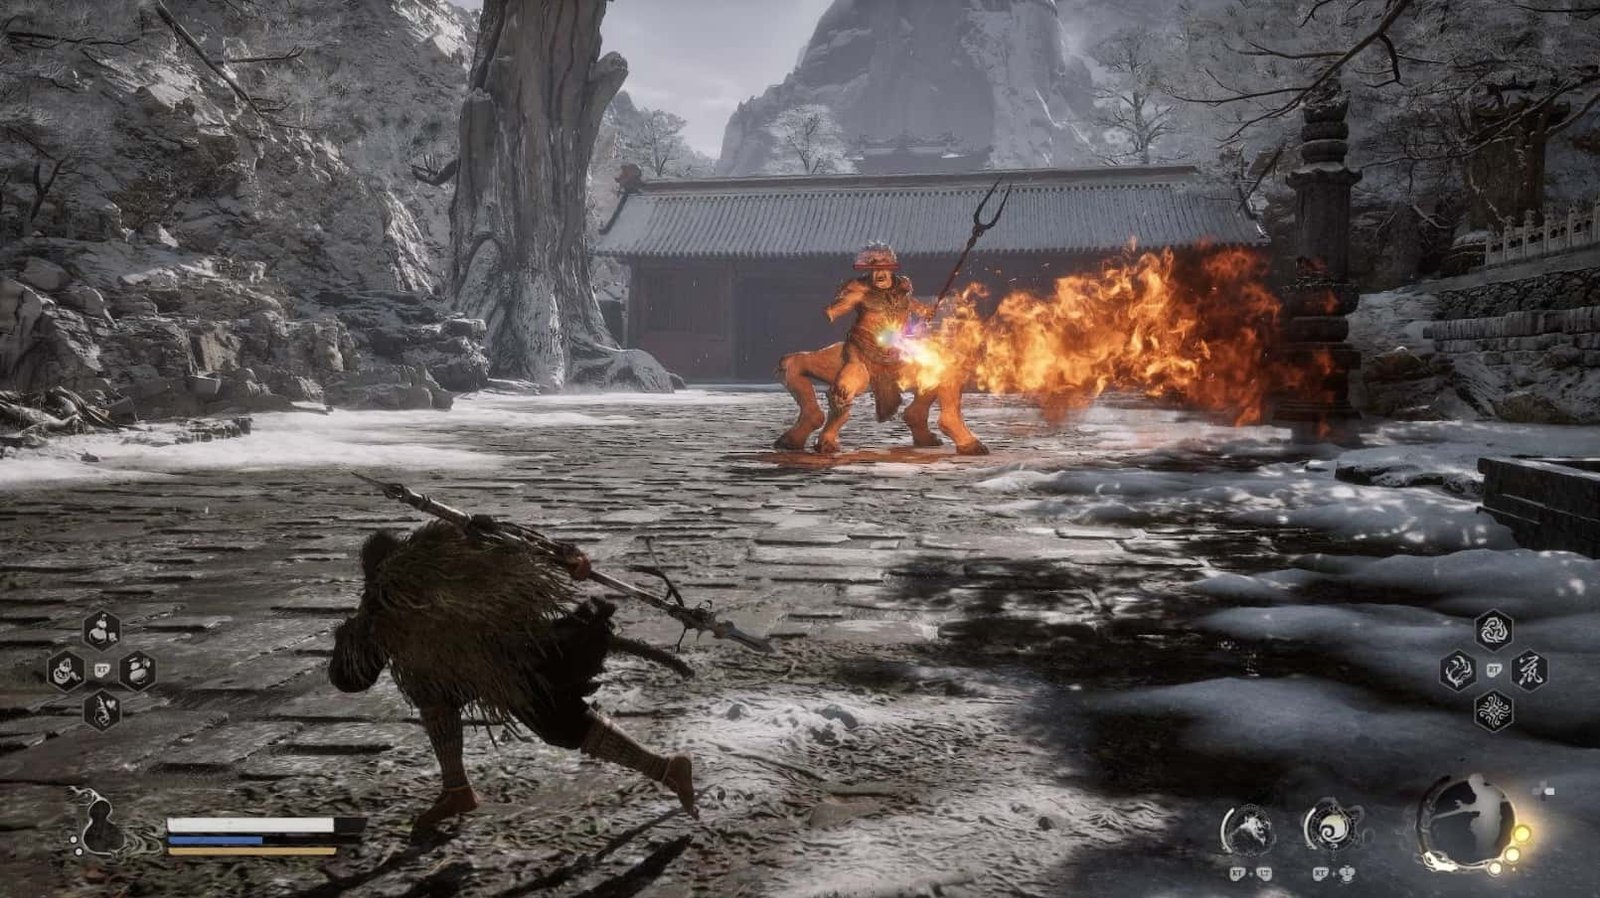
Your objective in this area is to cross the square, find a way to the Temple Inner Courtyard. But first, be cautious of the Yaoguai that guard this place. In addition to the familiar enemies from the temple gate like Supporter Monks, Overseeing Monks, Thunder Rhino Masters, you will face a great challenge – the Clay Vajra in Spirit form.
The Clay Vajra is a giant stone statue, moving slowly but each attack carries terrifying power. It uses a long spear, can spew fire from its chest and leg joints. Be careful with the sweeping spear attacks, continuous fire spewing, and especially when it channels energy, its whole body glowing with fire, preparing for an extremely powerful attack. Try to dodge, find openings, and attack its weak points. Defeating this Clay Vajra, you will receive the Clay Vajra Spirit – a powerful ally in later battles.
Don’t forget to uncover the secrets hidden in the square. Wisp 5 is located in a large vase next to the stairs leading to the next area. Treasure Chest 5 is located next to the building, behind where four Thunder Rhino Masters are lurking, be careful when approaching. The rewards inside are useful Materials for crafting and upgrading.
Before entering the Temple Inner Courtyard, I advise you to turn to the optional area located to the left of the main path. From the Temple Entrance Shrine, go through the Clay Vajra area, you will see a left turn leading down to this area.
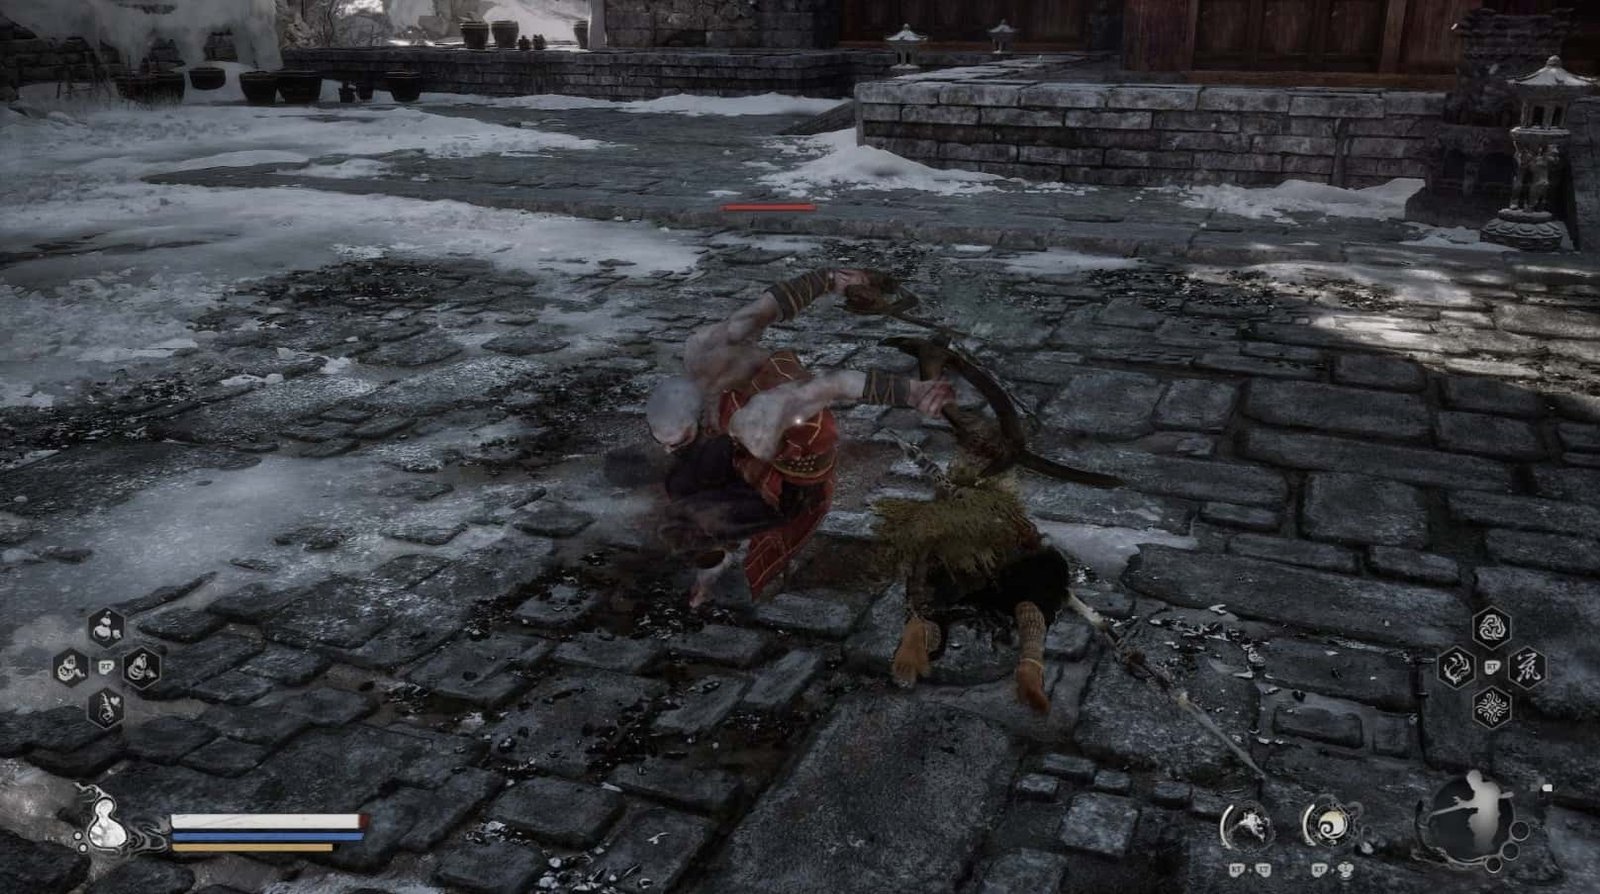
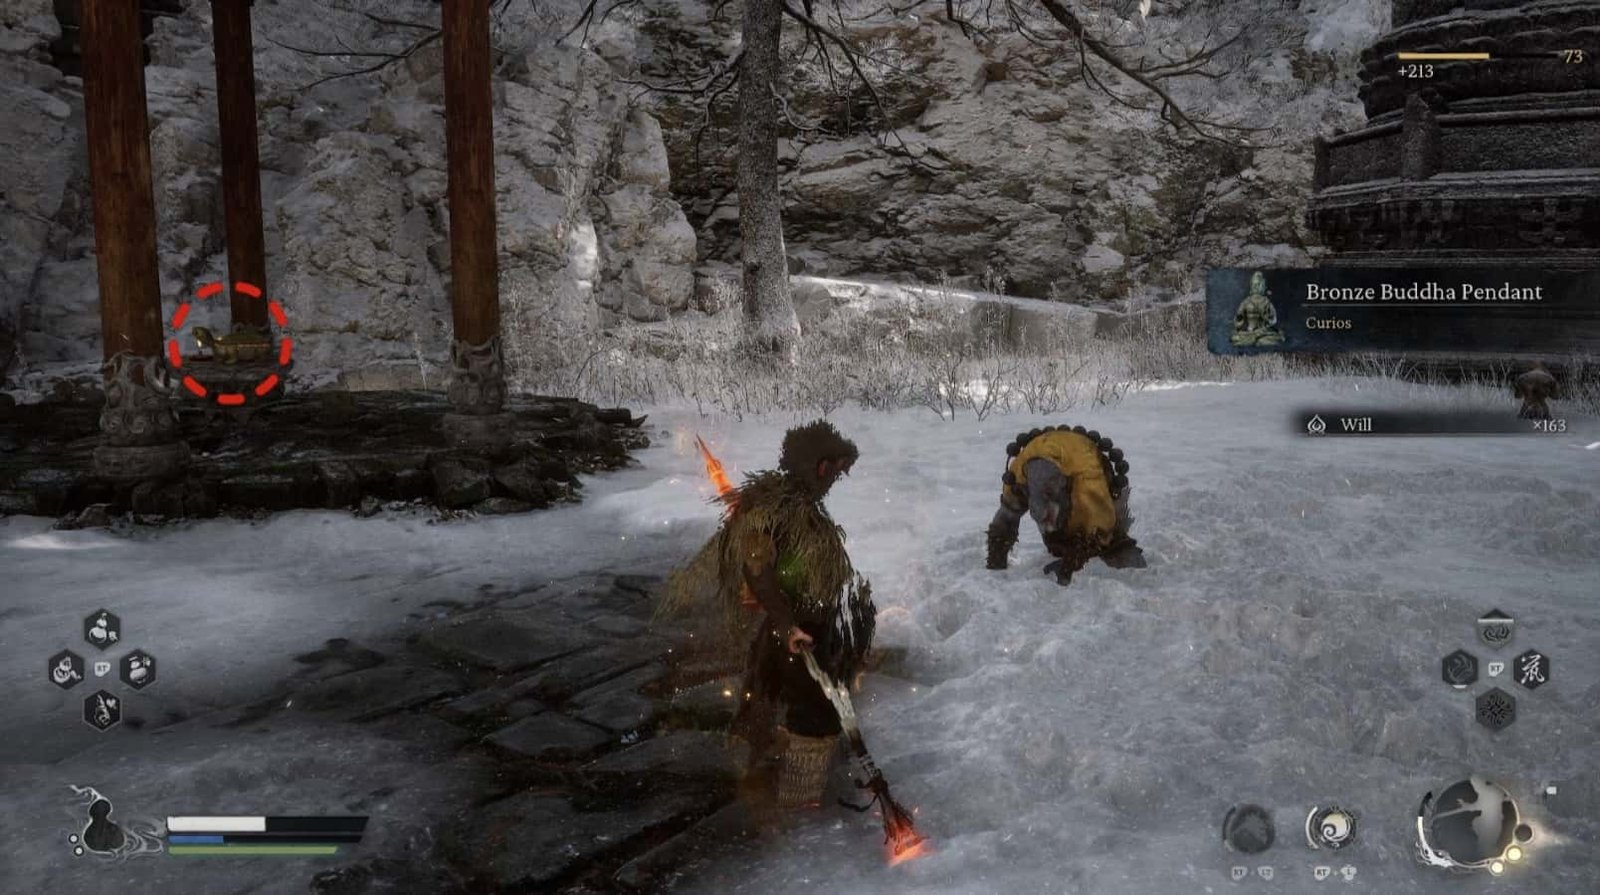
This place hides many secrets and a special character. Be careful with the Supporter Monks, weaker versions of Sea Monks, Wolf Guardians (some may drop the Curio – Bronze Buddha Pendant when defeated), Thunder Rhino Masters, and Overseeing Monks.
Treasure Chest 6 is located on a stone platform, to the right of the path down to the optional area (when viewed from above). Opening the chest, you will receive Tiny Piece of Gold x7 and Small Piece of Gold x1. Wisp 6 is located near a small frozen pond, next to a bridge. Treasure Chest 7 is located on a stone platform, to the left of the area, near the wall, containing Tiny Piece of Gold x7 and Small Piece of Gold x1.
To find Treasure Chest 8, you have to climb to the top of the building in this area, after defeating two Thunder Rhino Masters. The chest contains the Formula – Body-Fleeting Powder and Body-Fleeting Powder x3. Body-Fleeting Powder is an elixir that increases movement speed, without consuming stamina for a short time, extremely useful in dangerous situations.
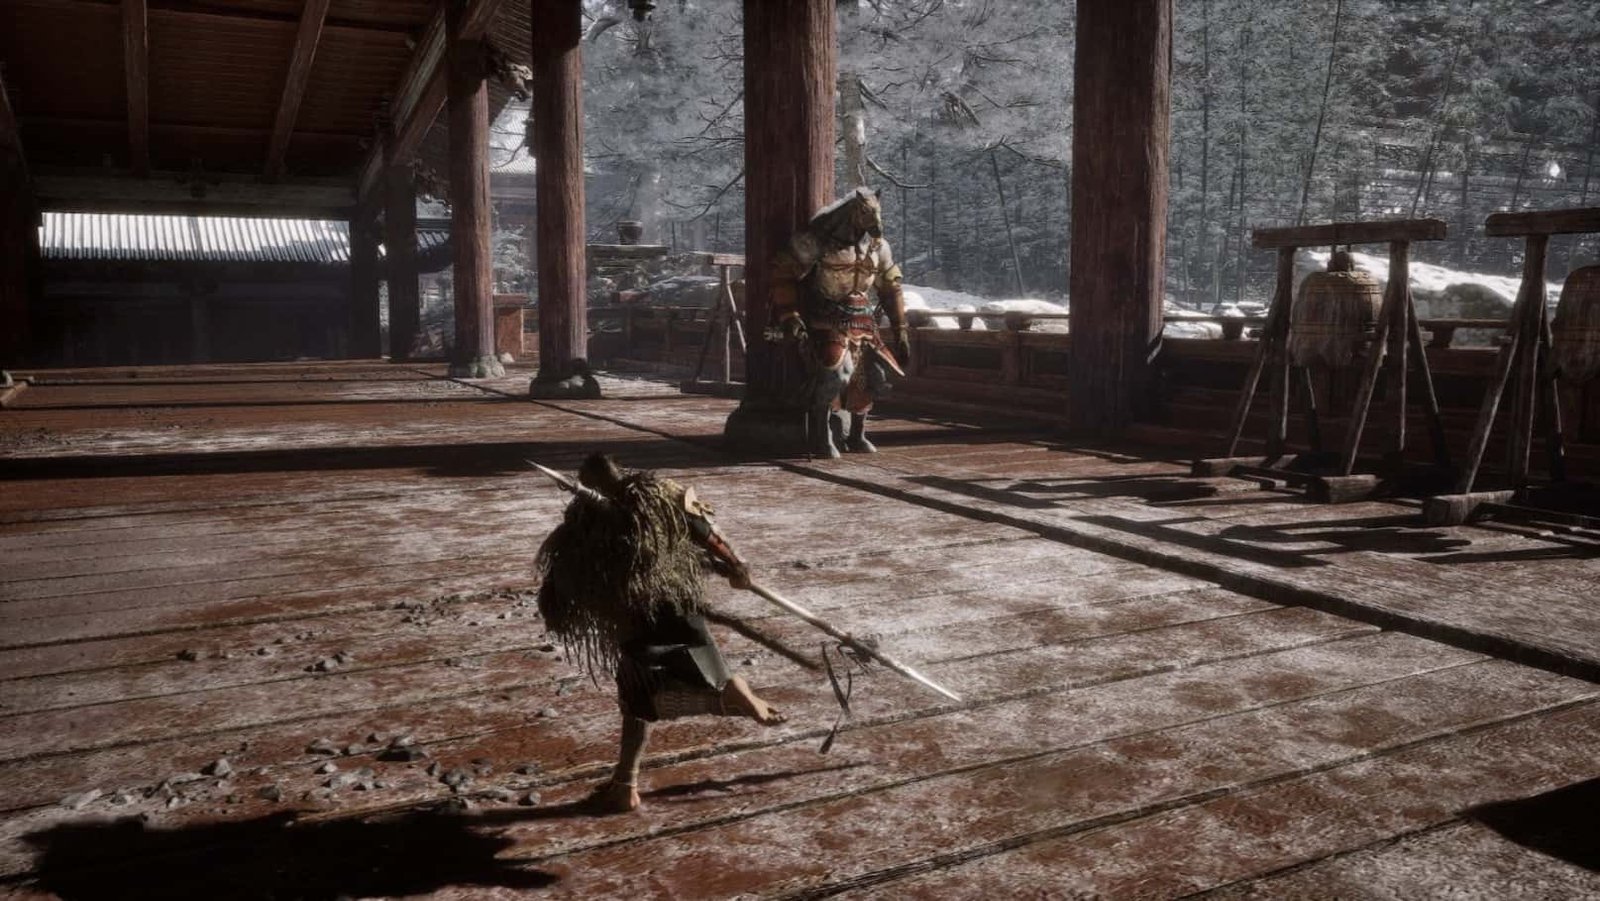
Here, you will meet the Horse Guai again. Talk to him to receive the Trailblazer’s Scarlet Gourd, a rare and precious treasure with extraordinary healing capabilities.
Before leaving the optional area, remember to find Wisp 7 near the altar, to the left of the area, where there is an Overseeing Monk.
Before confronting Non-Void, remember to complete the side quest for the Snow Fox. Return to the Forest of Felicity (the previous area) to receive the quest. Then, at the Temple Inner Courtyard, before entering Non-Void’s room, use the Snow Fox Brush to transform into The Fox. Once transformed, proceed inside. A special cutscene will play, revealing the connection between Non-Void and the Snow Fox, followed by the battle with him.
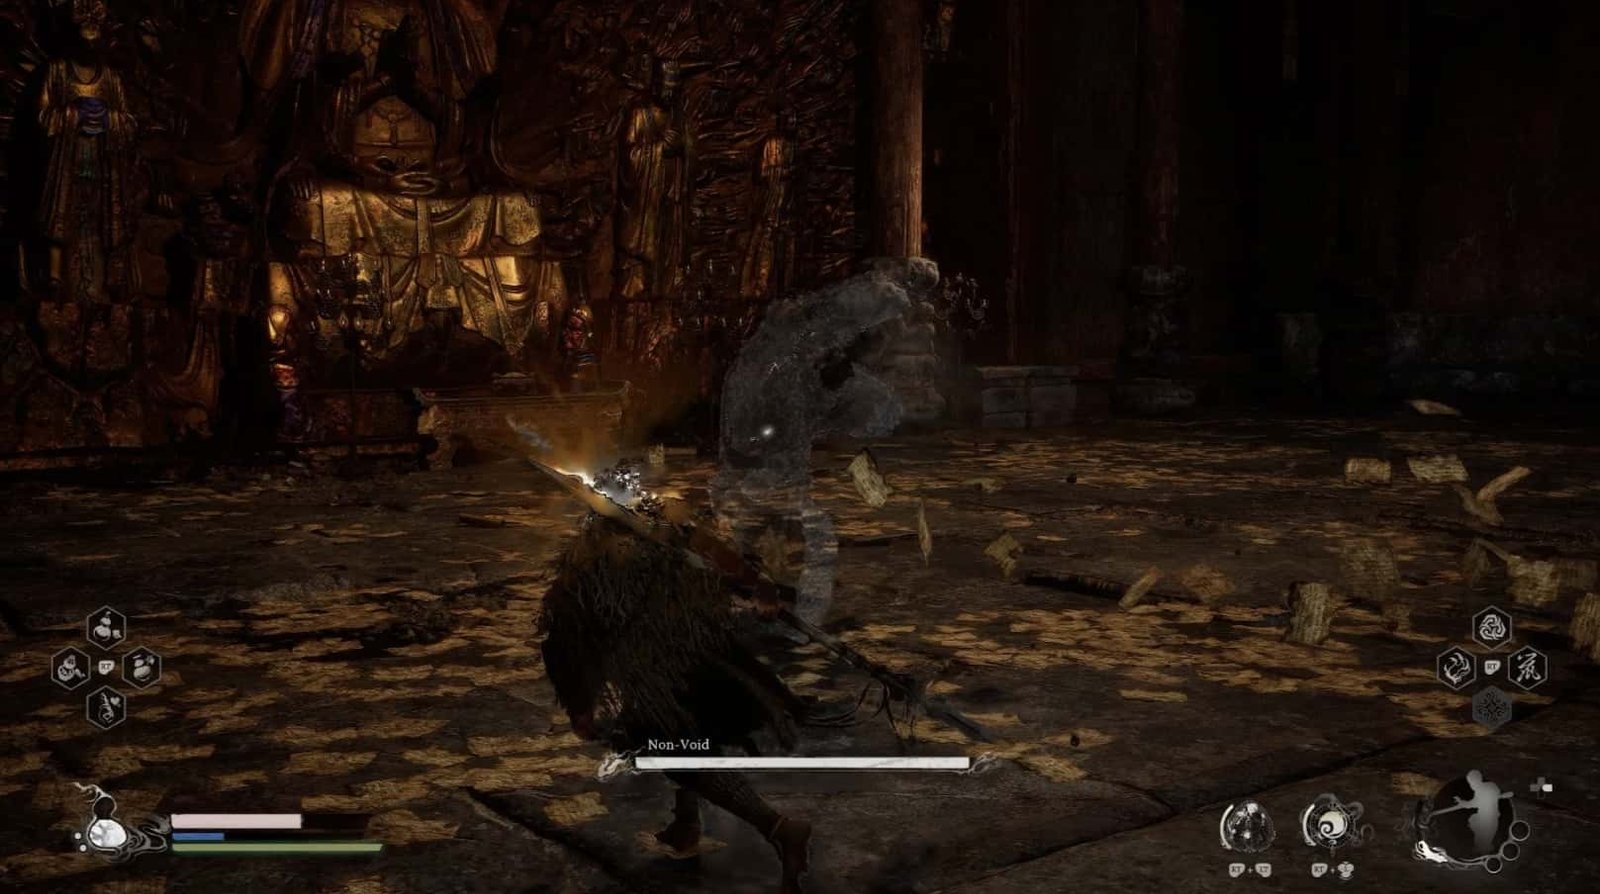
The special feature of Non-Void is his ability to switch between normal and invisible states. When invisible, he is immune to all attacks. Pay attention to his glowing glove, which indicates his current state. When the glove is glowing, Non-Void can block and counterattack. At this time, you should focus on dodging, do not attack directly, especially Immobilize, as it will have no effect.
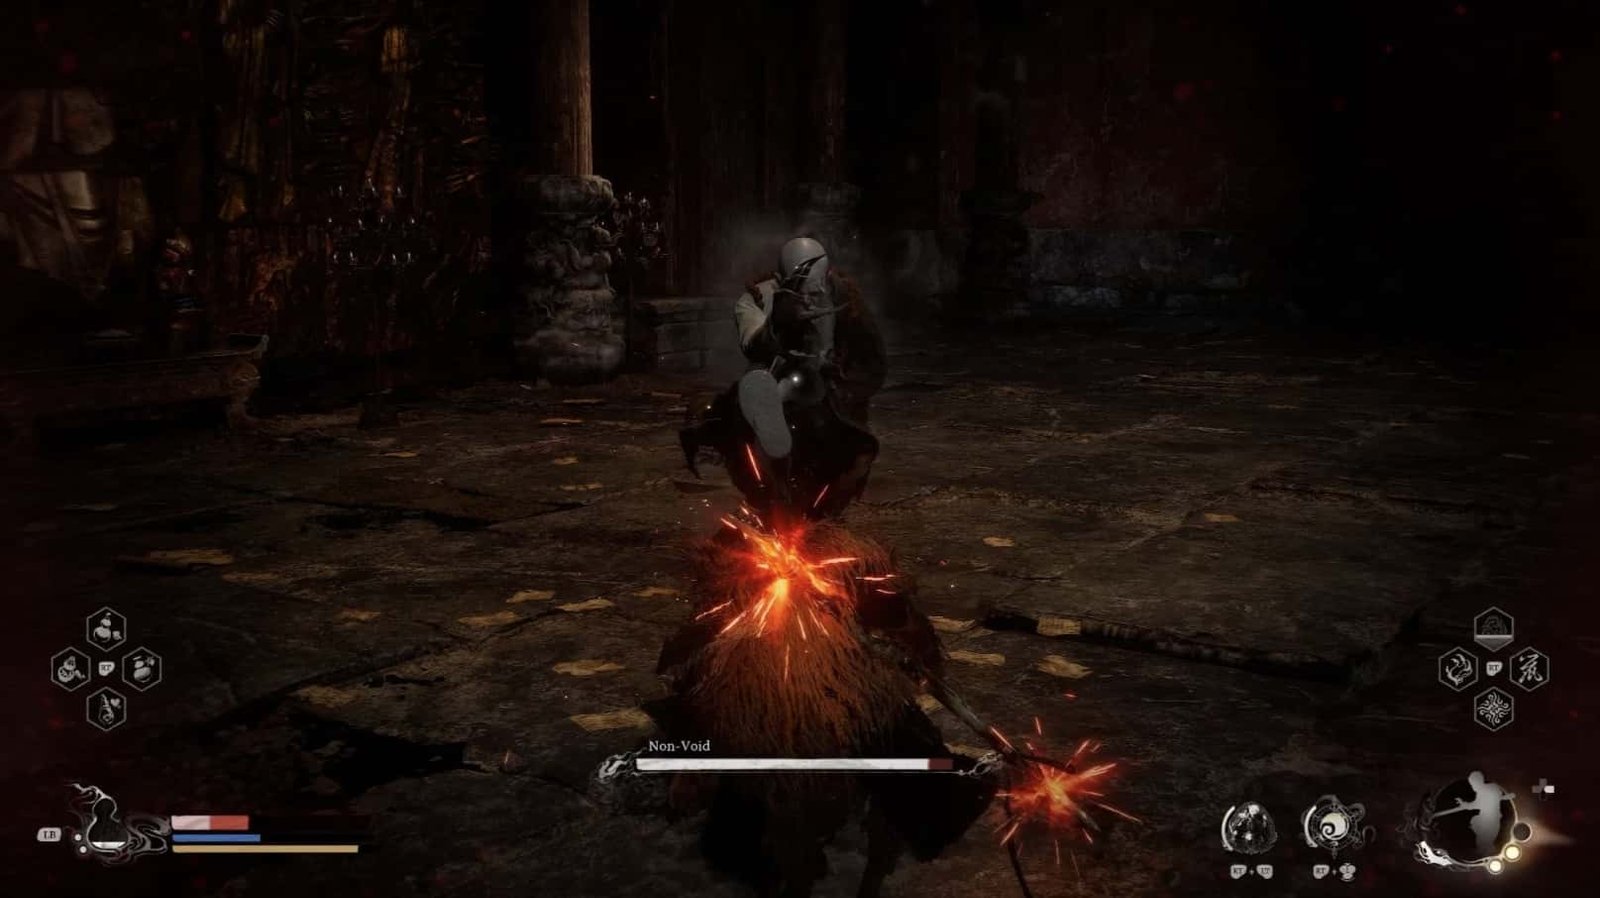
When the glove is not glowing, he is in his normal state, take this opportunity to attack. Fast, continuous attacks combined with Spirit Attacks will be highly effective. Defeating Non-Void, you will receive the Non-Void Spirit – a powerful ally in later battles.
Completing this quest, you will receive the Curio – Snow Fox Brush from the Snow Fox. This item will extend the duration of your transformation, very useful in combat.
I advise you to return to the Shrine at the Temple Entrance to recover before leaving this area.
After exploring the Temple Main Plaza and the optional area, it’s time for you heroes to venture into the Temple Inner Courtyard, where even more difficult challenges await. Prepare yourselves for a relentless battle!
Temple Inner Courtyard
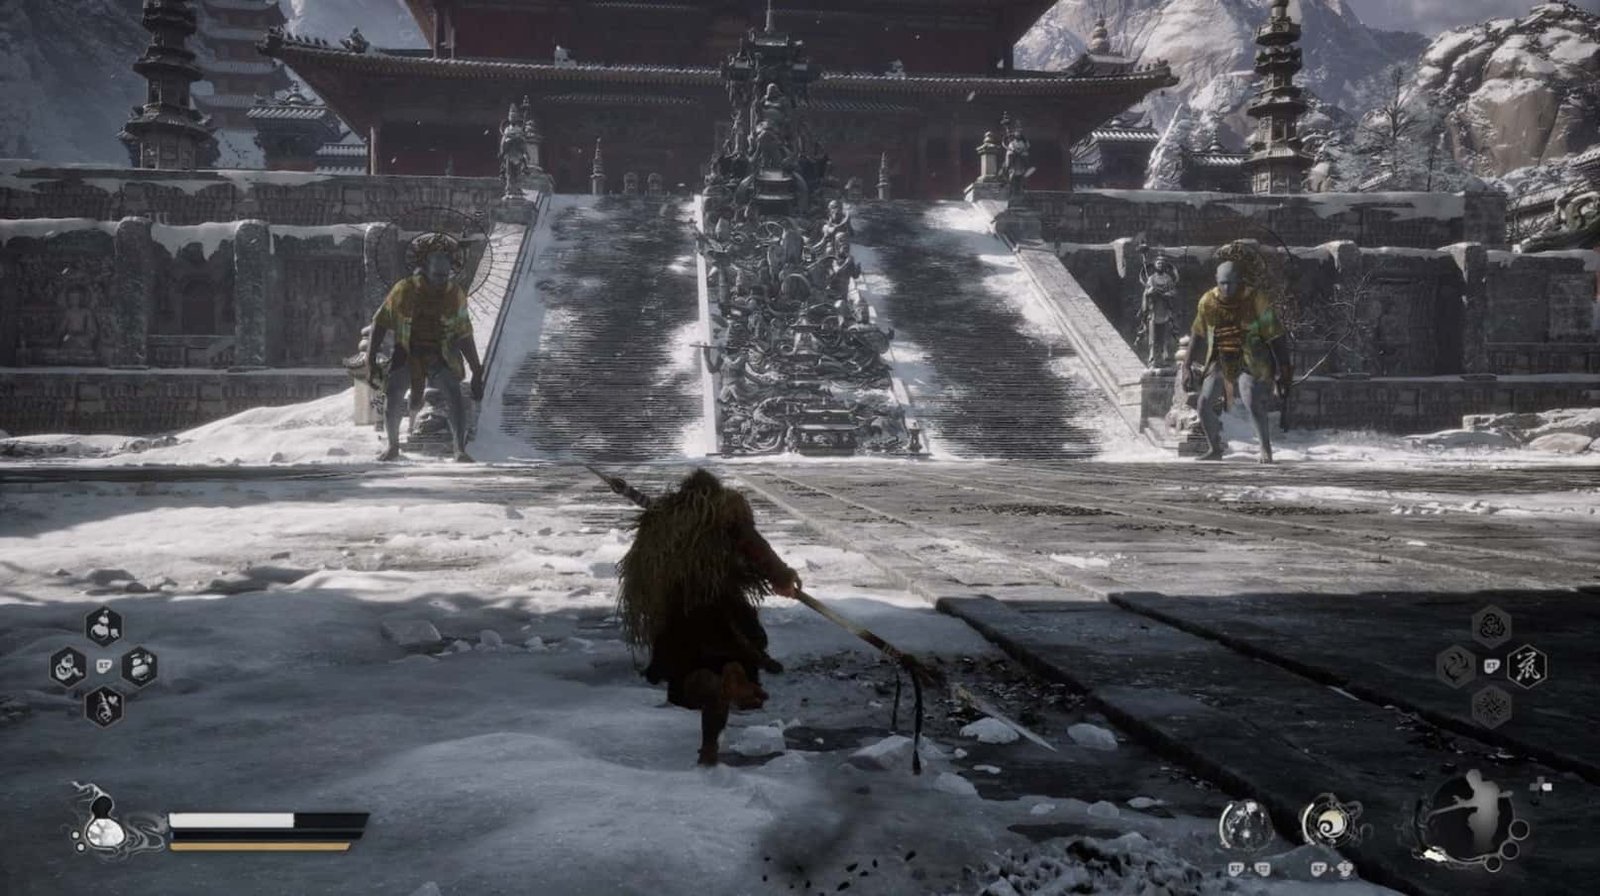
From the Temple Main Plaza, passing the imposing Clay Vajra statue, you heroes will ascend the long stairs leading to the Temple Inner Courtyard of the New Thunderclap Temple. The scenery here is even more desolate and cold, with two giant Dark-faced Overlord statues guarding both sides like two guardian deities, ready to punish anyone who dares to trespass.
Your objectives in this courtyard are to overcome the challenges, activate the Shrine: Mahavira Hall, defeat Yaoguai Chief – Non-Pure, find the Meditation Spot.
The two Dark-faced Overlord statues are the first challenge. They attack with giant maces, each strike carrying devastating power, capable of knocking you into the air. Not only that, they can also throw rocks from a distance, forcing you to constantly move, dodge, and look for openings to counterattack. Utilize all your combat skills, dodge flexibly, and take advantage of the terrain to defeat these two guardians.
After defeating the two statues, the Shrine: Mahavira Hall will be activated. Save your progress and recover here, because ahead lies the battle with Non-Pure, one of Yellowbrow’s disciples. He moves swiftly and unleashes continuous and unpredictable attacks.
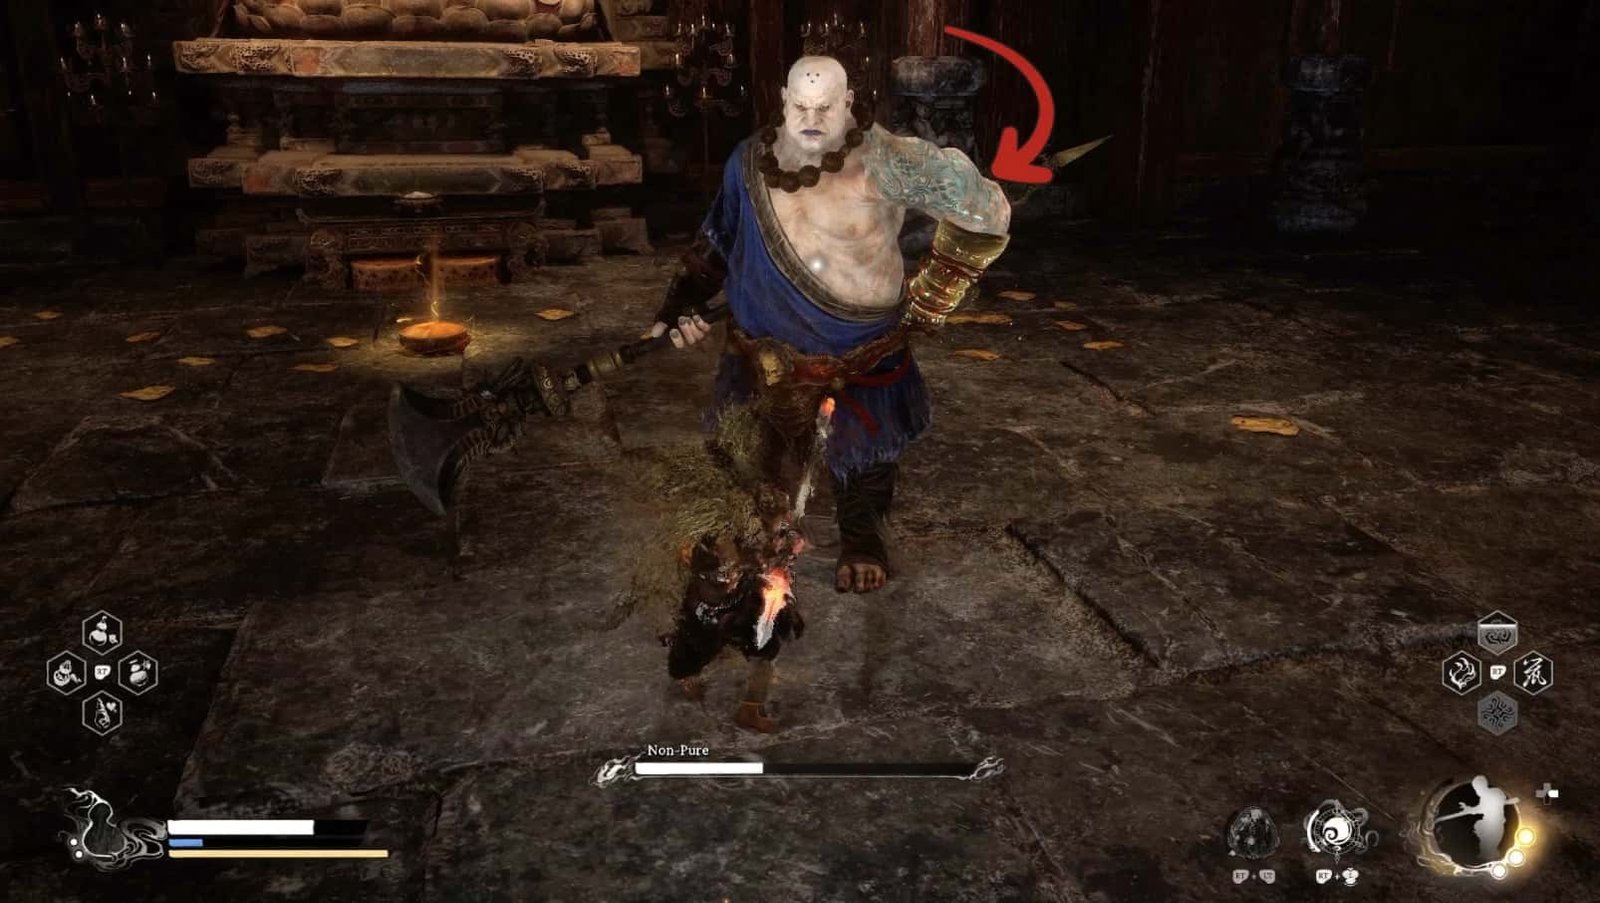
There is a Wisp 8 located in a small vase next to the door to Non-Pure’s (Bất Tịnh) room. Also in this room, near the statue, you will find the Meditation Spot – The Hall, New Thunderclap Temple. Meditating here will increase your Skill Points, thereby enhancing your martial arts, preparing you for more difficult challenges. Non-Pure’s location is to the right, when facing the two statues.
If you want to collect more items, from the Mahavira Hall Shrine, go to the left down the stairs, you will reach a secluded bamboo garden. Here, you can find the Celestial Nonary Pill near the frozen waterfall and a Treasure Chest (containing Materials) near the area with the Clay Vajra, next to a large stone pillar.
Finally, find Wisp 7 by going back from the Mahavira Hall Shrine towards the altar, to the left of the area, where there is an Overseeing Monk (belonging to optional area 2 – Temple Main Plaza).
After completing everything in the Temple Inner Courtyard, you are ready for the final battle, the fateful battle with Yellowbrow at the Mahavira Hall! Take a deep breath, use all your martial arts, intelligence, and courage to win this battle!
Mahavira Hall & Yellowbrow Boss Fight
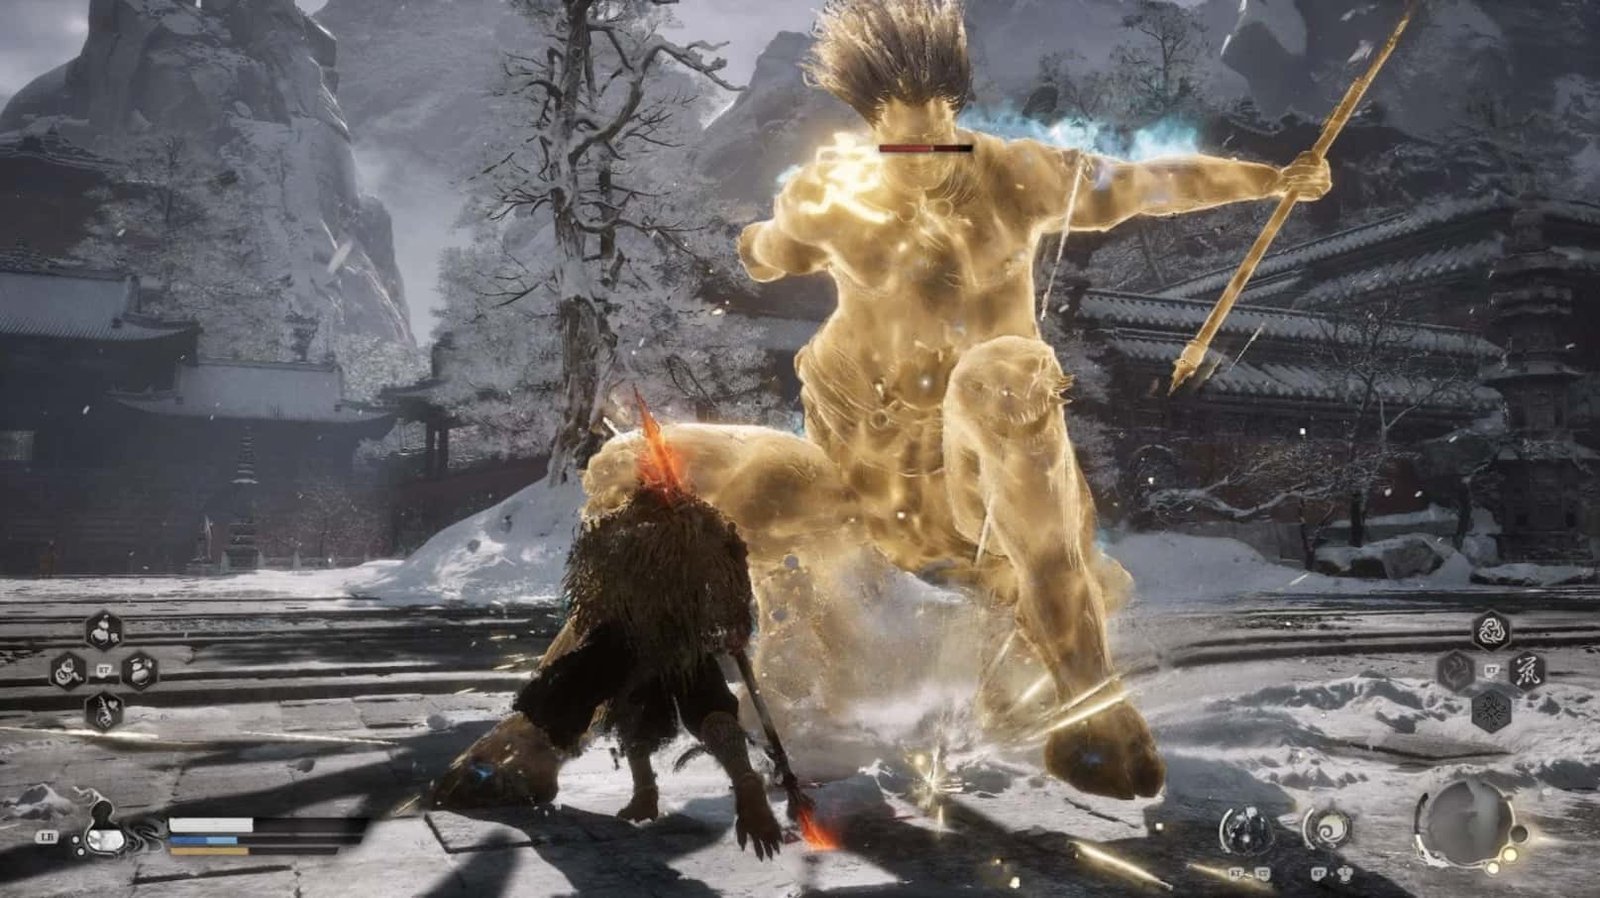
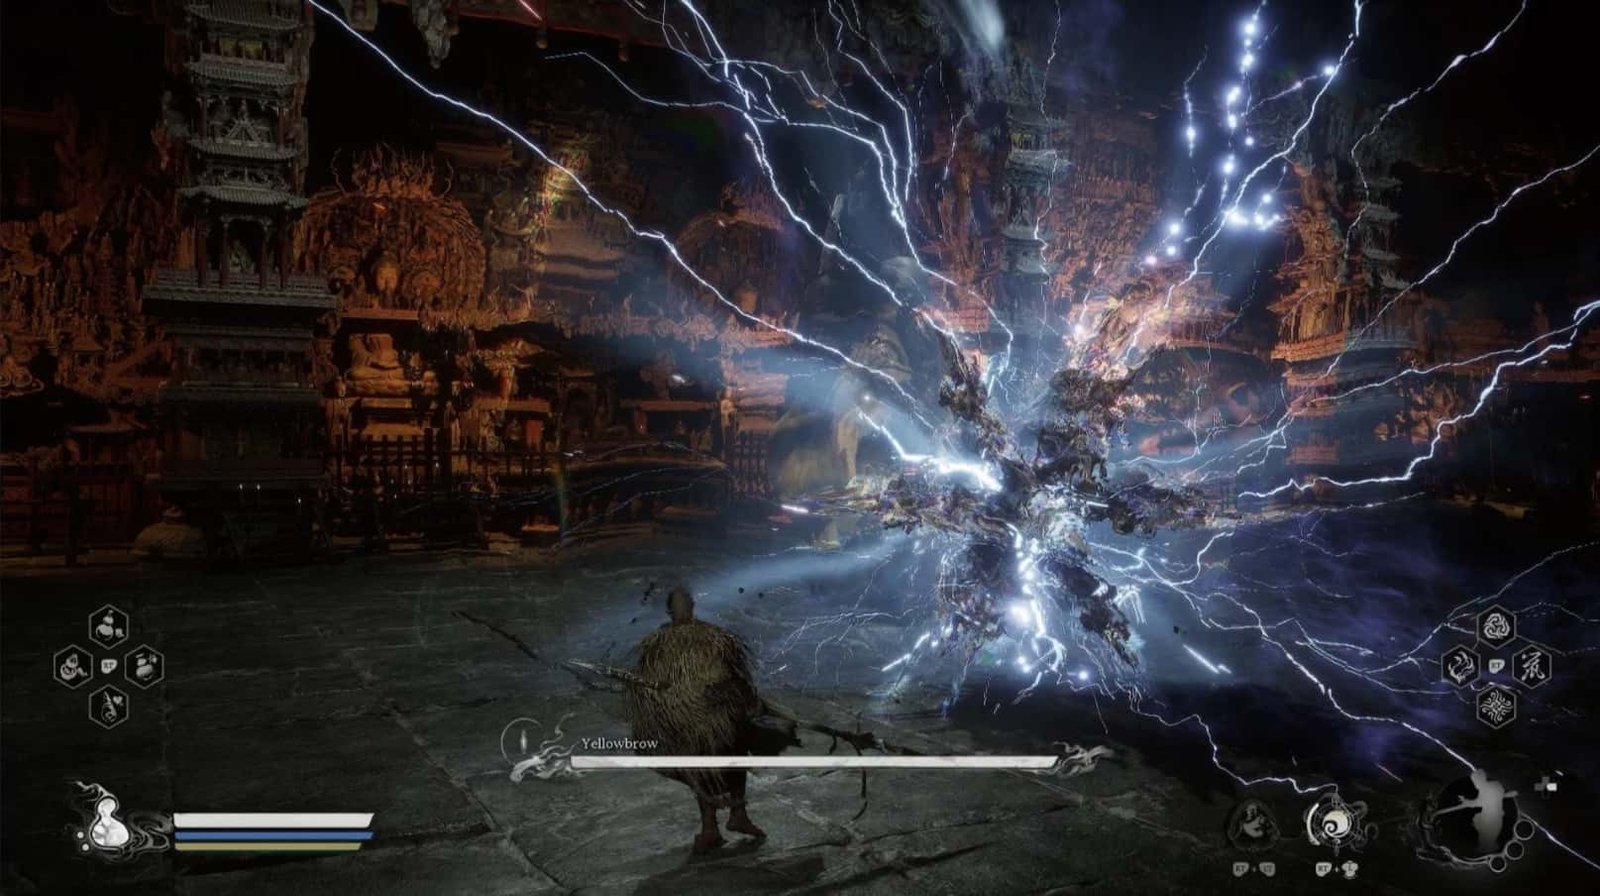
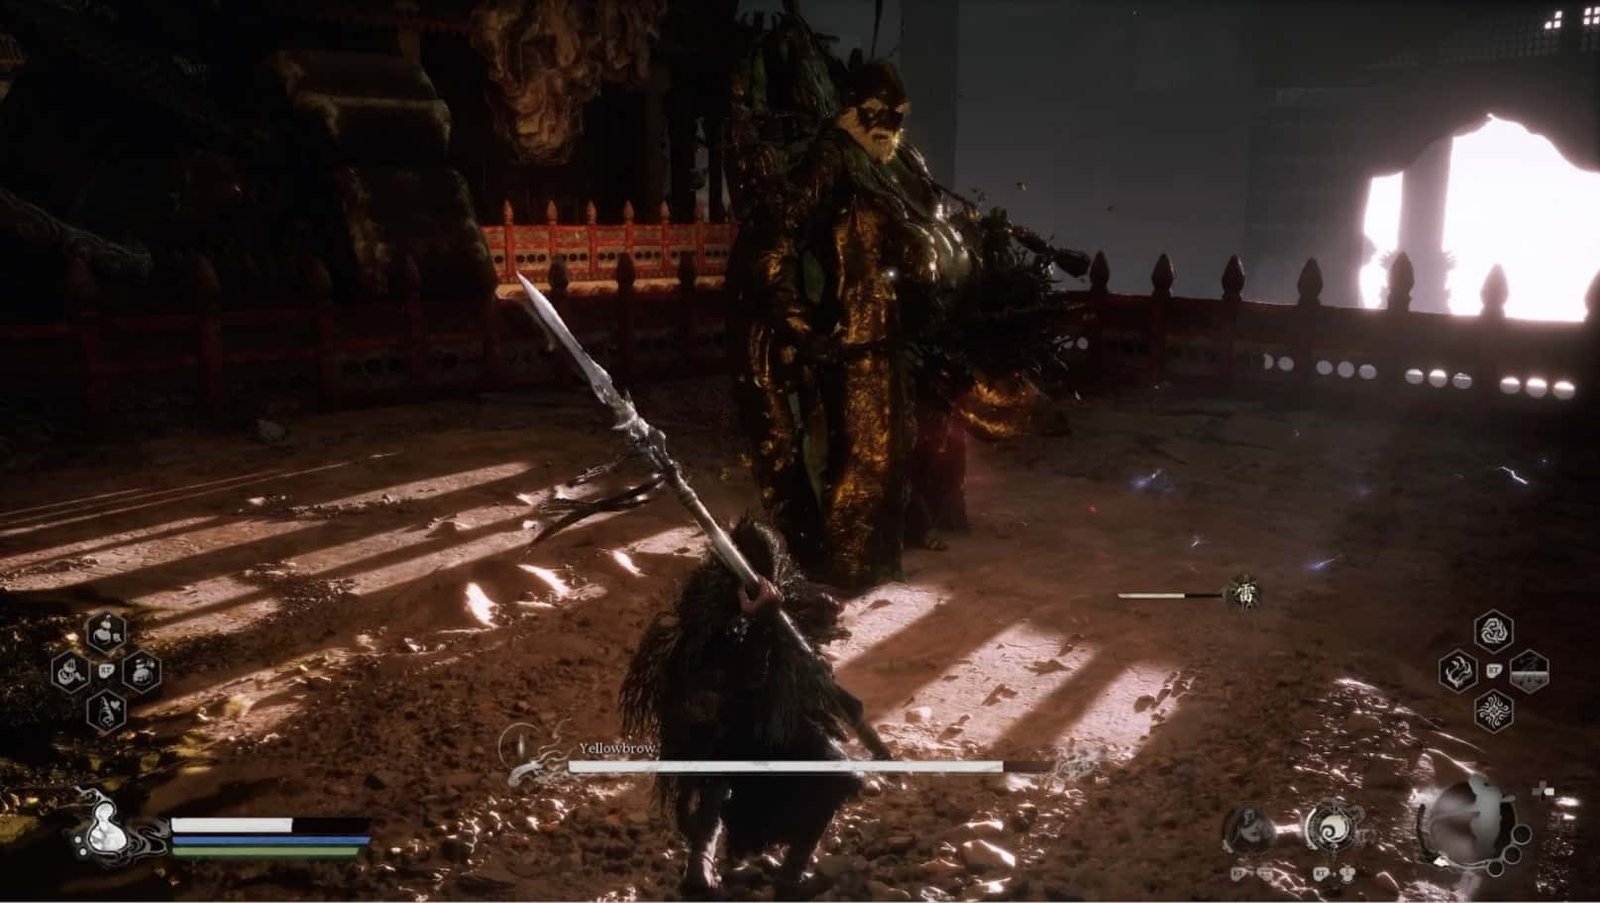
Upon crossing the majestic gate of Mahavira Hall, you heroes will face a life-or-death battle, the final battle at the New Thunderclap Temple – Yaoguai King – Yellowbrow, the cunning final boss of Chapter 3 – White Snow, Ice Cold. This battle is arduous, extremely challenging, divided into three phases, requiring you to use all your martial arts, intelligence, and even luck.
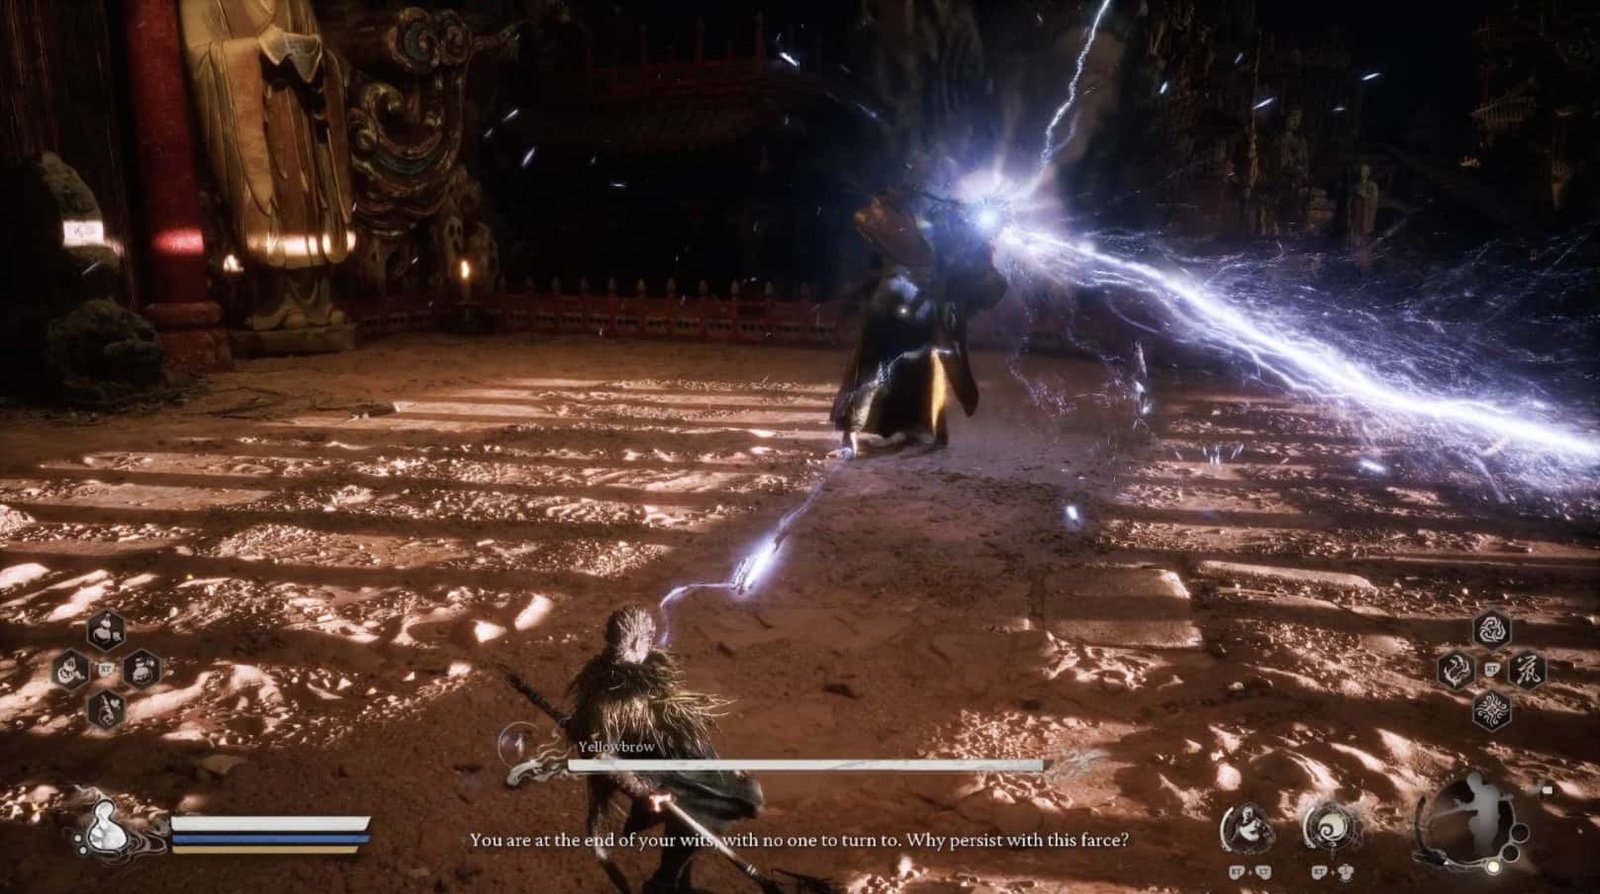
Yellowbrow is a formidable opponent. He not only possesses a large, imposing body but also wields a giant mace that can change size and length unpredictably. Moreover, he is proficient in lightning magic, summoning storms of electricity, deadly electric fields, and fierce lightning bolts, ready to incinerate any enemy.
In the first phase, Yellowbrow mainly attacks with his mace. He often swings the mace in an arc, creating powerful shockwaves. Sometimes, he will slam the mace to the ground, causing widespread tremors. Pay attention to how he channels his energy to predict the direction of the attack and dodge in time.

His lightning attacks usually appear in the form of lightning bolts or electric fields. Observe the ground, avoid these dangerous areas, and be especially careful of the Shocked status – it will cause you to take a large amount of extra damage.
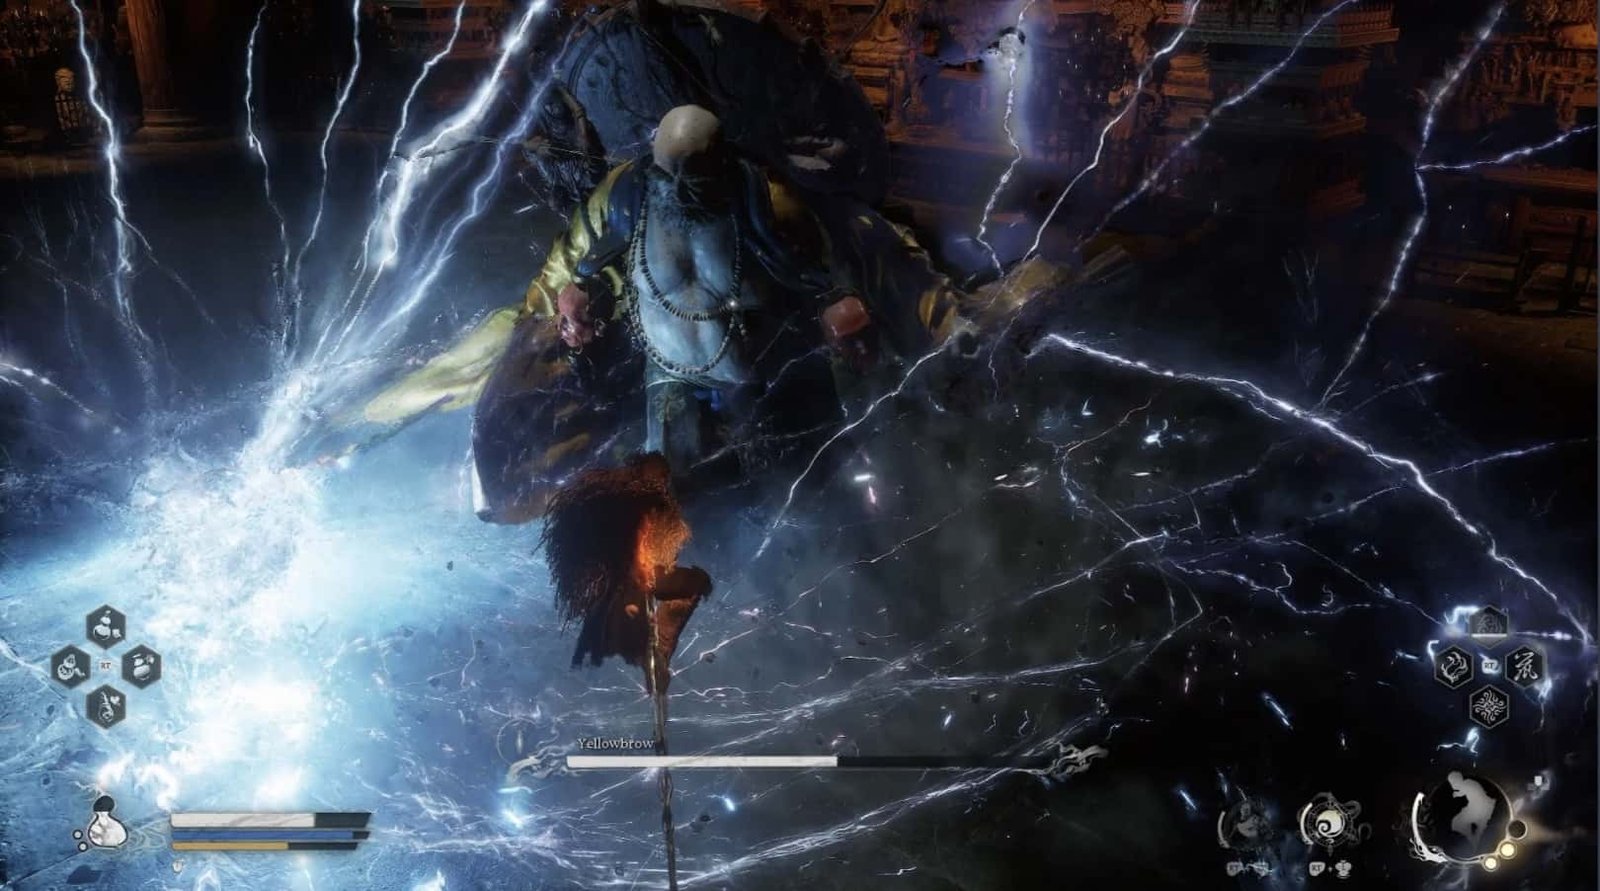
Attack Yellowbrow when he is vulnerable, especially after he uses his mace attacks. Wind Tamer will be a powerful ally, helping you interrupt dangerous attacks, especially when he is charging up, creating a thunderstorm.
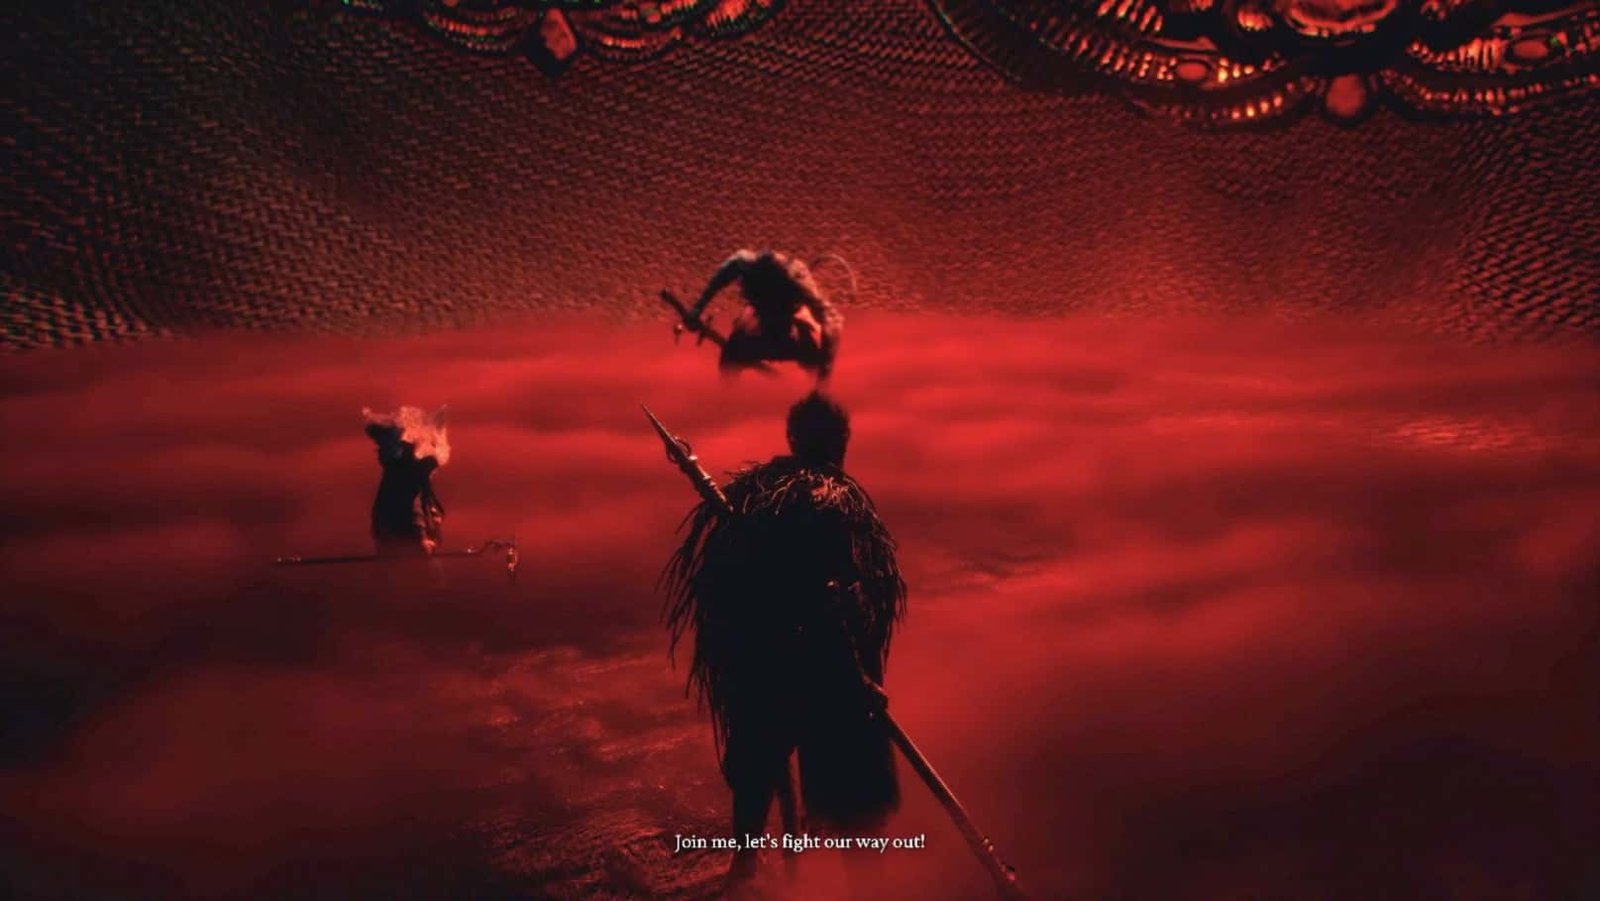
In the second phase, an old enemy but with superior power will appear – Macaque Chief.
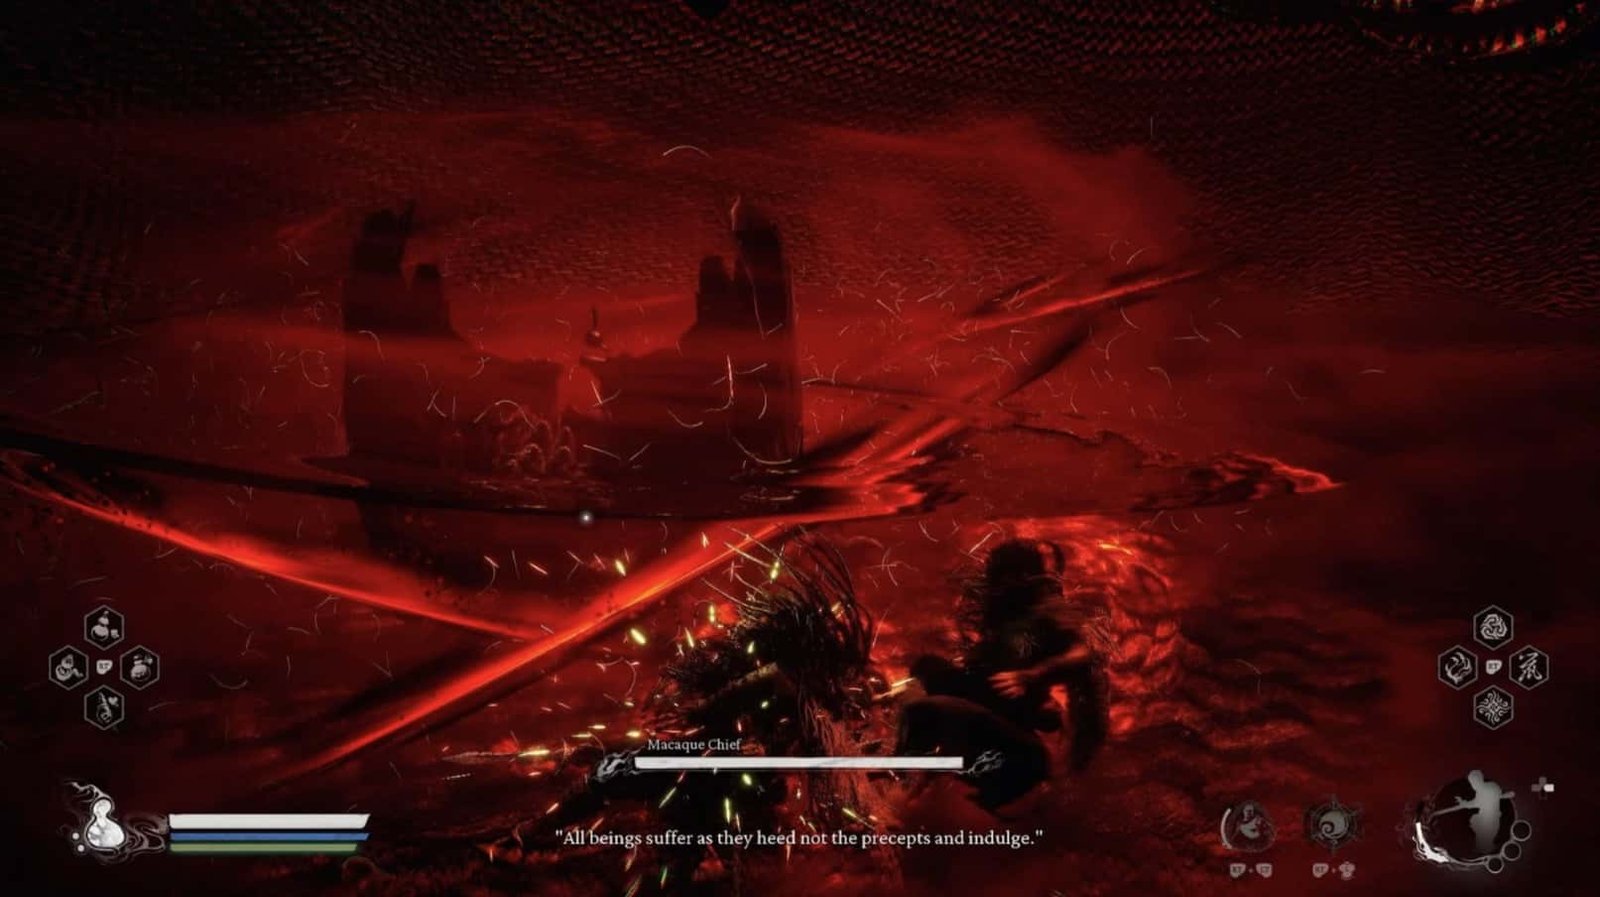
He flies in the air, creates clones, and attacks from a distance with his ghostly sword. Prioritize destroying the clones quickly, because although they are weak, they can disrupt your formation, making it difficult for you to defend.
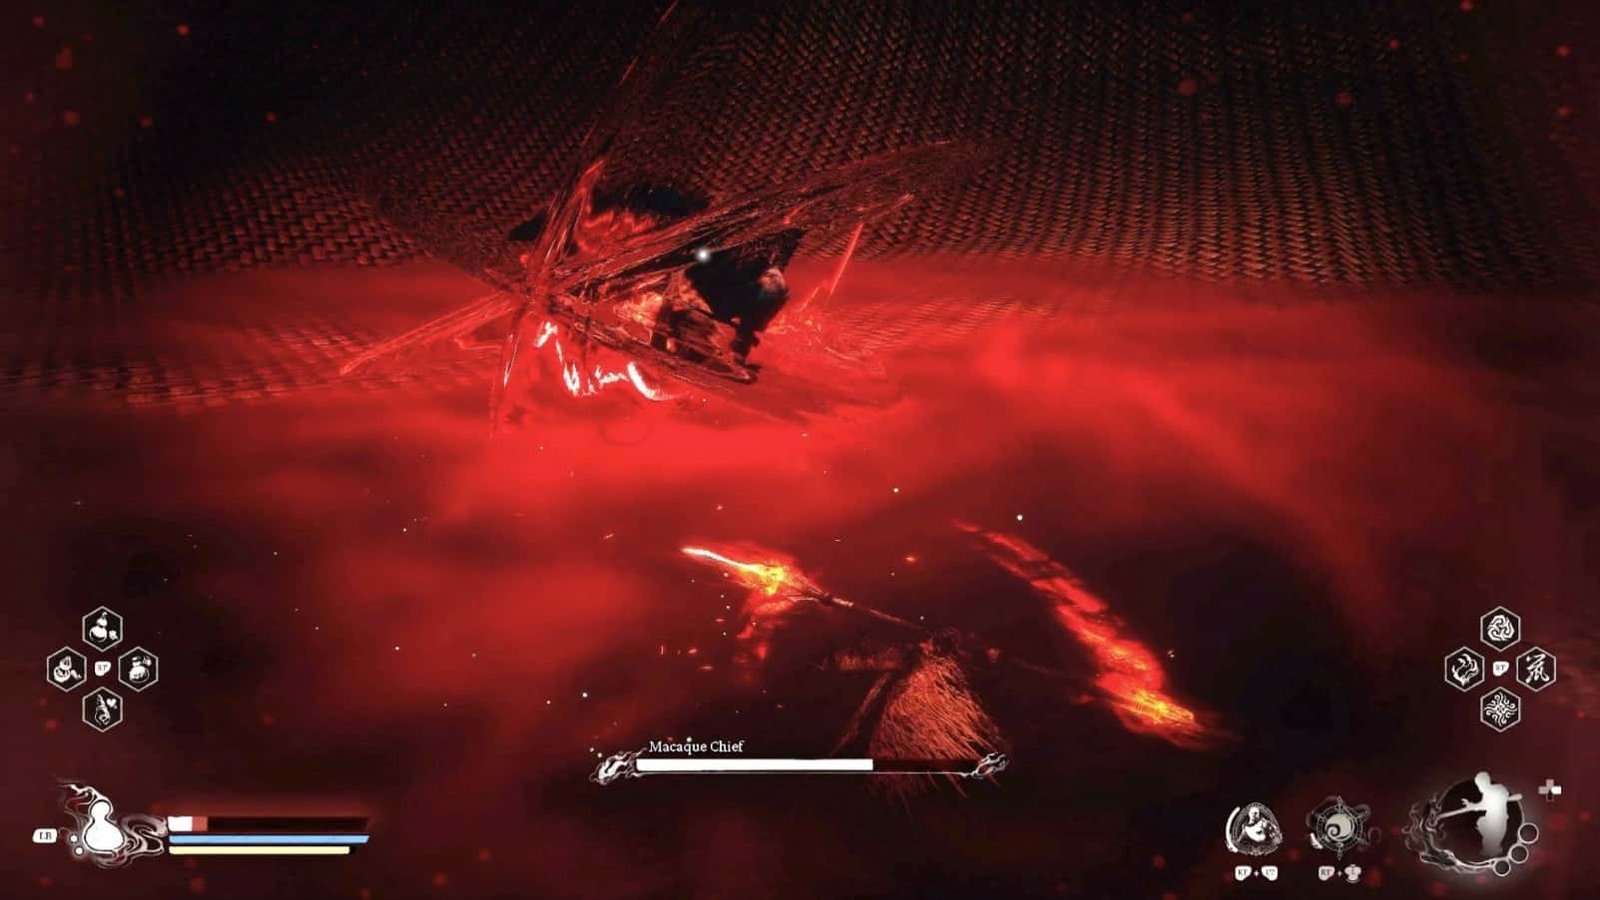
When the Macaque Chief lands, focus your attacks on him. He often uses continuous sword strikes, be careful to dodge or block.
Defeating the Macaque Chief in this phase, you will subdue him, adding Macaque Chief (Mahavira Hall) to your list of Spirits.

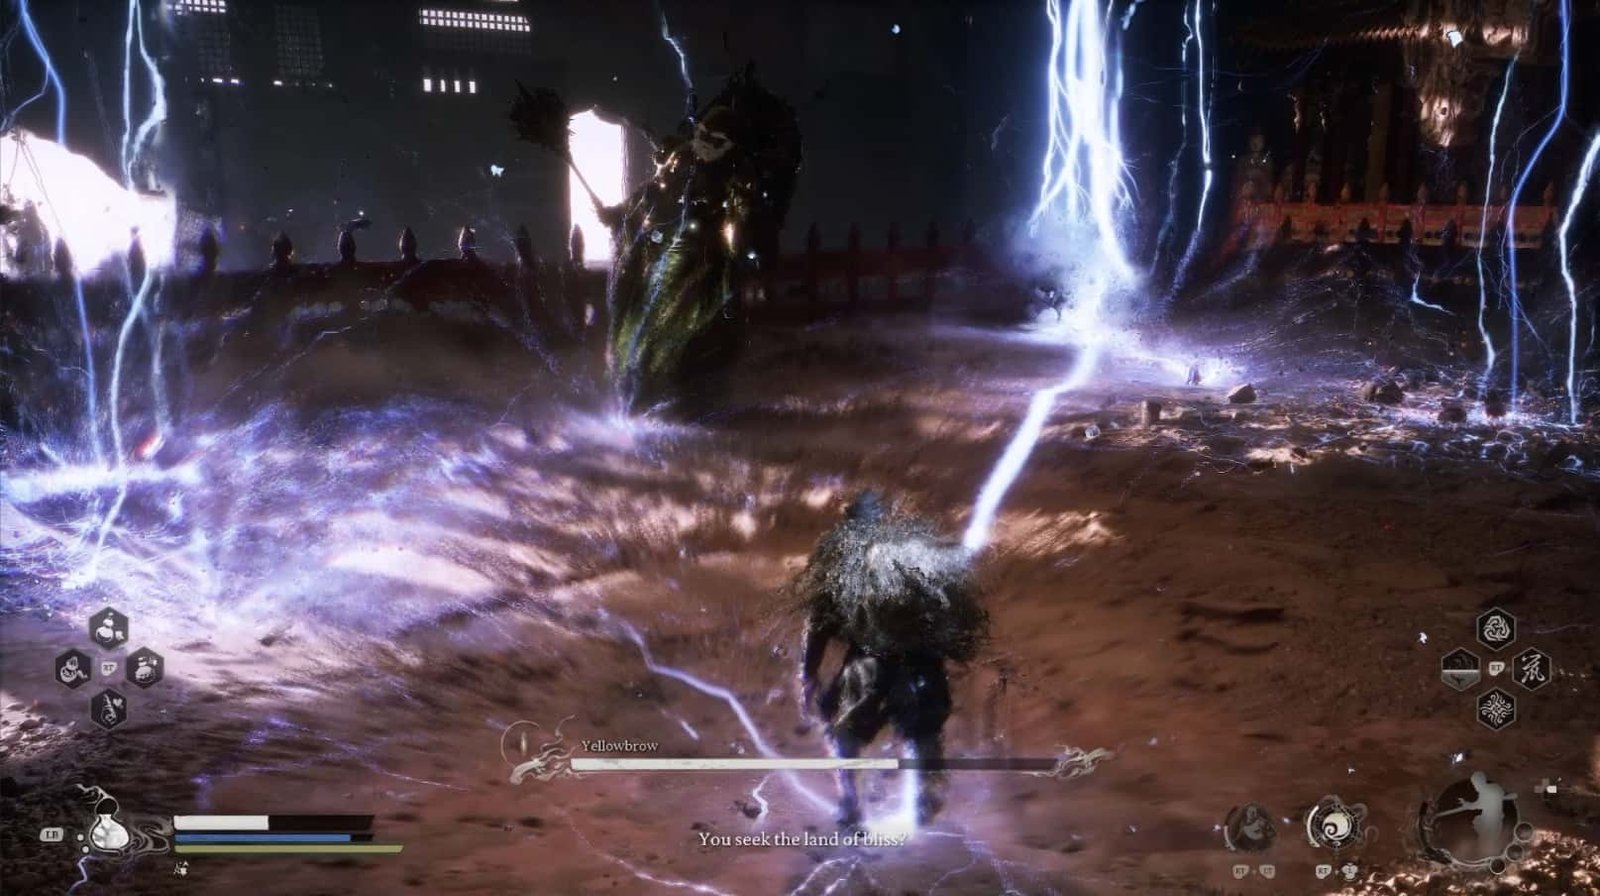
The third phase is also the final phase, Yellowbrow returns with significantly increased power. He will use new attacks that are more powerful and ferocious.
In particular, he can cover himself in a golden armor, making him invincible for a short period.
At this time, you need to use Heavy Attacks to break this armor. Each Heavy Attack needs to be fully charged, requiring patience and accuracy. Continue to dodge lightning attacks and mace attacks.
Be especially careful with the electric fields created after each of his attacks, they will persist for a while and deal continuous damage. When Yellowbrow is charging up, creating a thunderstorm, quickly move away from the area of effect or use Wind Tamer to dispel it, avoiding unnecessary death.
This is the most difficult phase, life and death are separated by a hair’s breadth. Use all your skills, healing items, and Spirit Attacks wisely. Remember, Shock-Quelling Powder is an essential item to counter the Shocked status, and Soak – Sweet Ice will help you increase your resistance to frost from before.
Defeating Yellowbrow, you not only save yourself but also bring peace to the world. The rewards for this glorious feat are Relic – Hubris Nose – one of the six relics containing immense power, Apramana Bat Spirit – received in the final battle, along with a large amount of Will, Cosmo Radiance, Fine Gold Thread x2, Gold Tree Core x1, Cold Iron Leaves x3, Refined Iron Sand x2, and a Mind Core.
After the battle, a cutscene will play, revealing the next secrets and opening Chapter 4 of this arduous journey.