
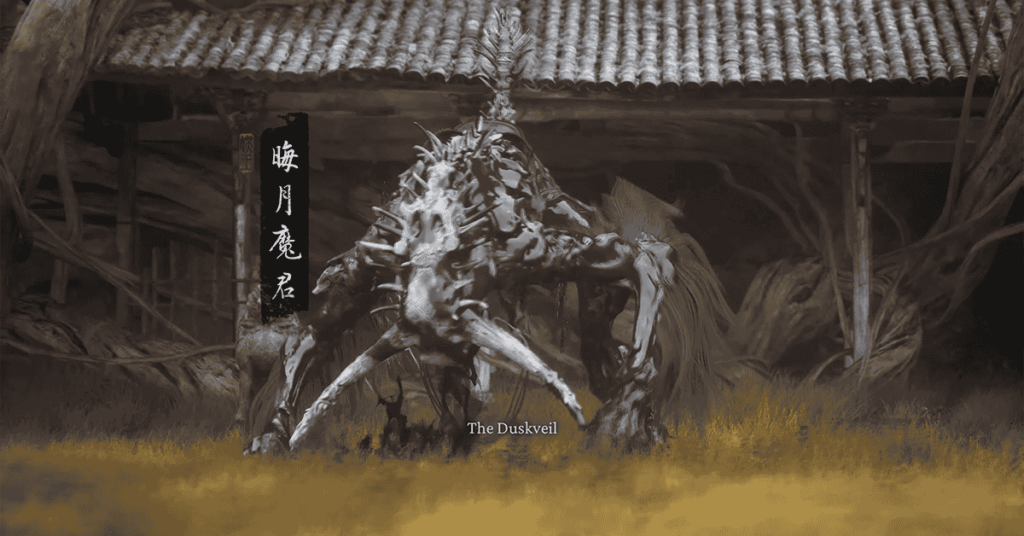
In Black Myth: Wukong, The Duskveil is not only a challenging Yaoguai King guarding the peak of Purple Cloud Mountain, but also a mandatory challenge to obtain the Weaver’s Needle Vessel – the key to unlocking subsequent chapters. This article will be your pocket guide, with detailed instructions from A-Z: location, preparation, in-depth strategy, and of course, the well-deserved rewards. Let’s conquer the “demon chicken” The Duskveil!
Location and Recommended Loadout
To find The Duskveil, you need to reach Purple Cloud Mountain – a hidden area in Chapter 4. Don’t worry, the path isn’t too complicated. Starting from the Shrine in the Valley of Blooms, find your way up to Petalfall Village, you can take any path. Just follow the trail, and you will reach the summit area where The Duskveil awaits.
To reach Purple Cloud Mountain, you must defeat Venom Daoist twice, once in Upper Webbed Hollow and once on a side path outside the main area of the Temple of Yellow Flowers, which unlocks a mural allowing travel to this area.
Important warning: You must defeat The Scorpionlord and Daoist Mi before confronting The Duskveil. Otherwise, these two bosses will “disappear,” causing you to miss the chance to get their rewards.
Golden Loong Staff is an excellent choice due to its high damage output and beneficial effects.
You should use the Double-Combed Rooster Blood Soak. It not only cures the Poisoned State but also increases movement speed and Critical Hit Chance.
Upgrade your equipment and weapons to maximize your power.
Enhance your character stats, focusing on important stats like attack and defense.
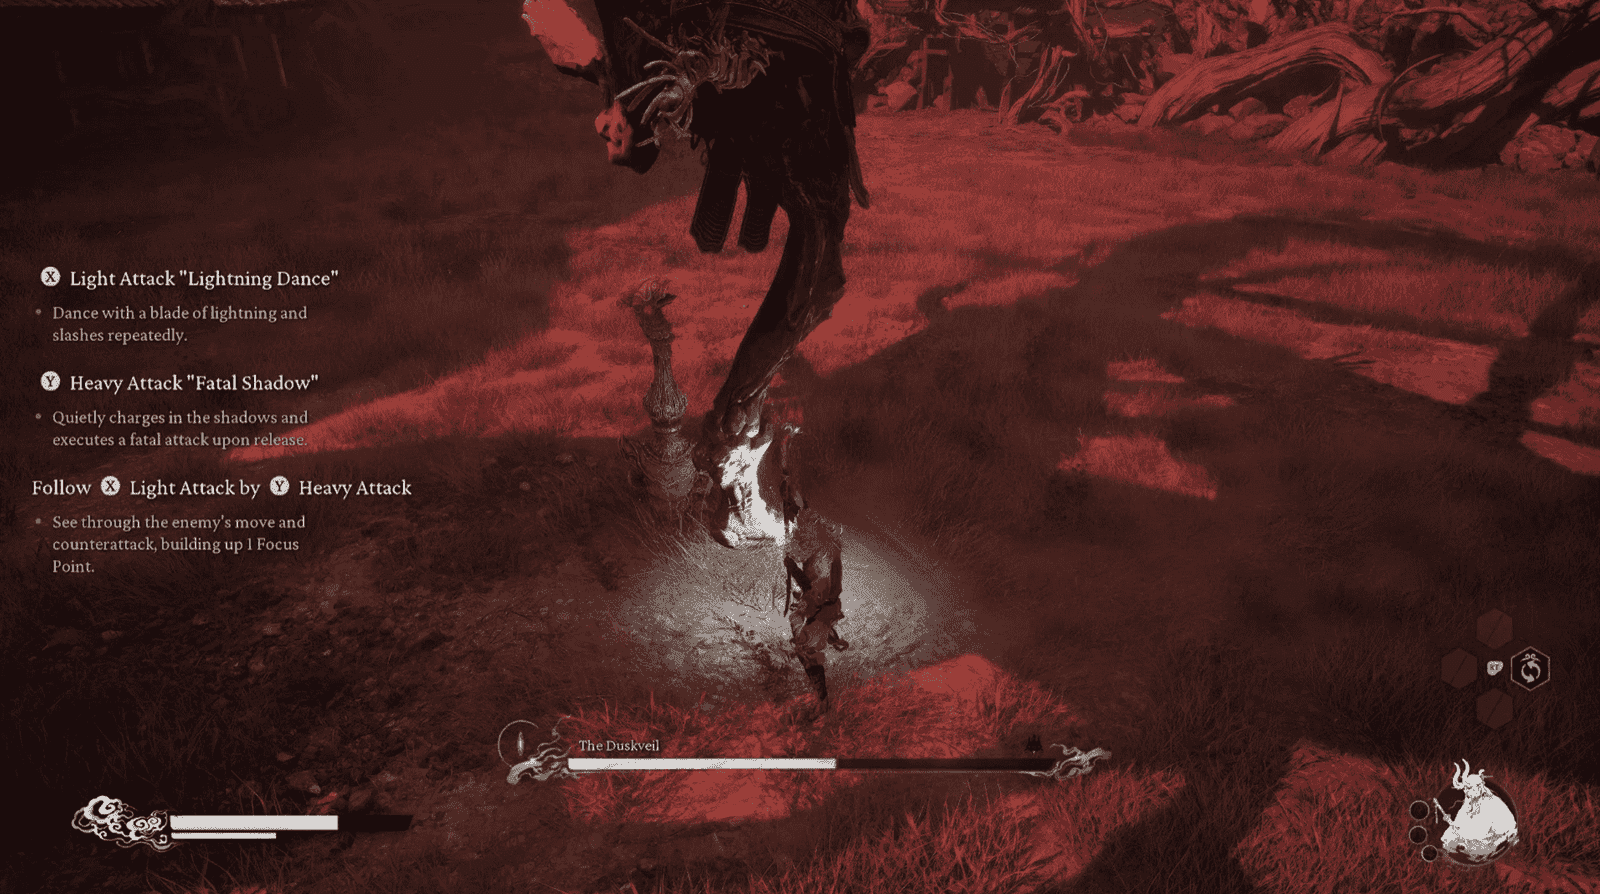
Practice and familiarize yourself with combos.
The Duskveil Boss Fight and Guide
If you haven’t defeated The Scorpionlord before, it will appear during this phase and only attack The Duskveil. Just ignore it and focus on The Duskveil; you can even take advantage of the situation to attack while they are “busy” with each other.
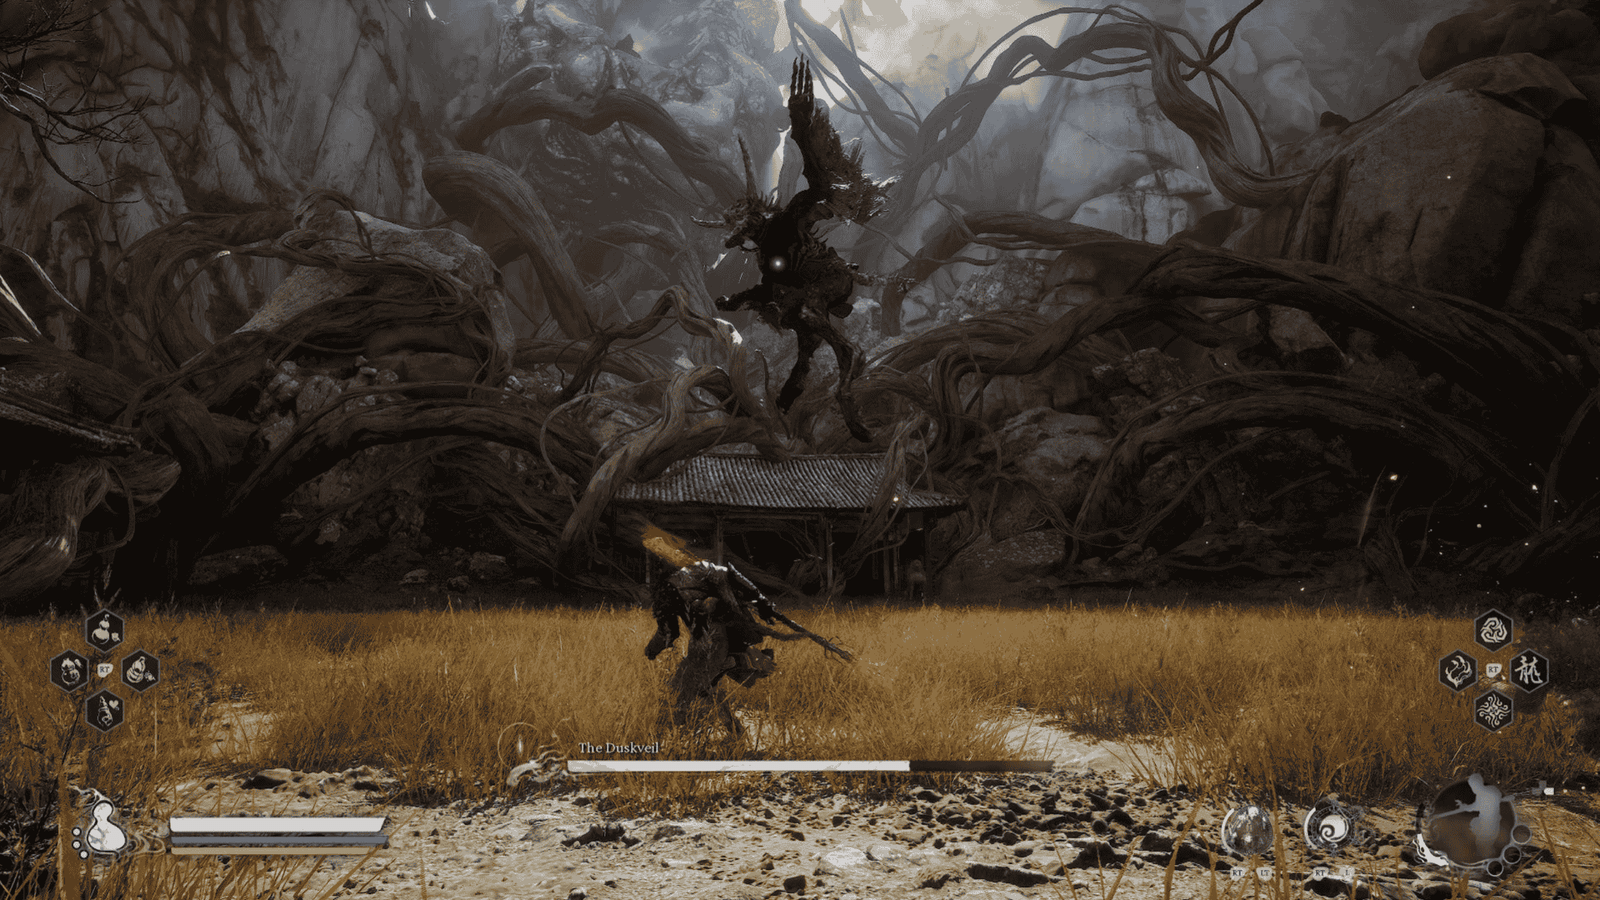
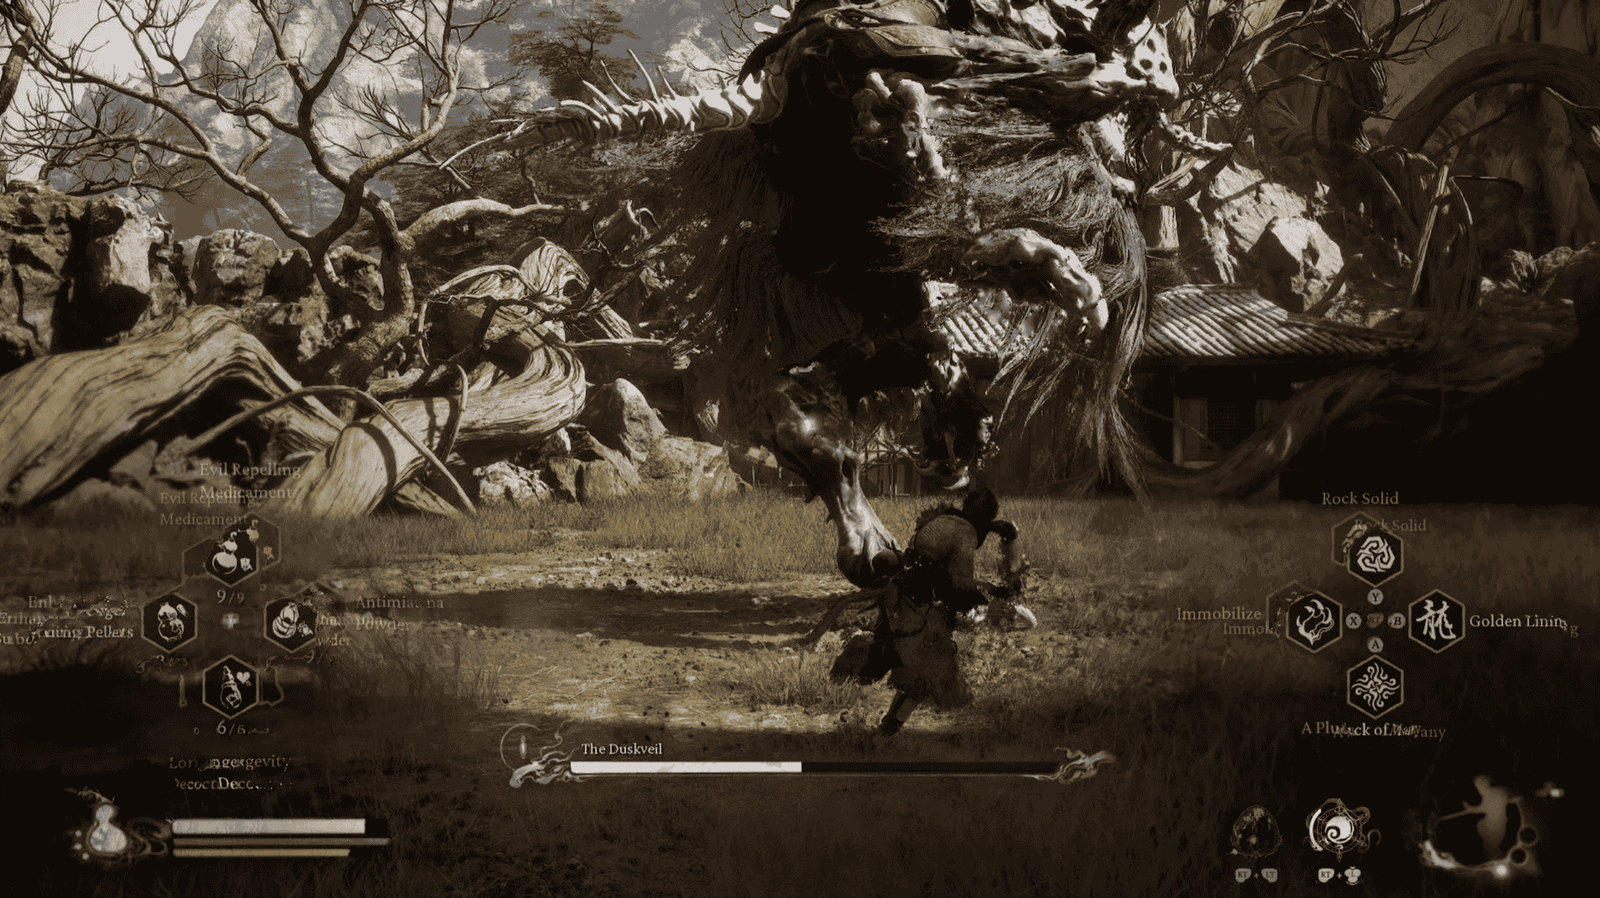
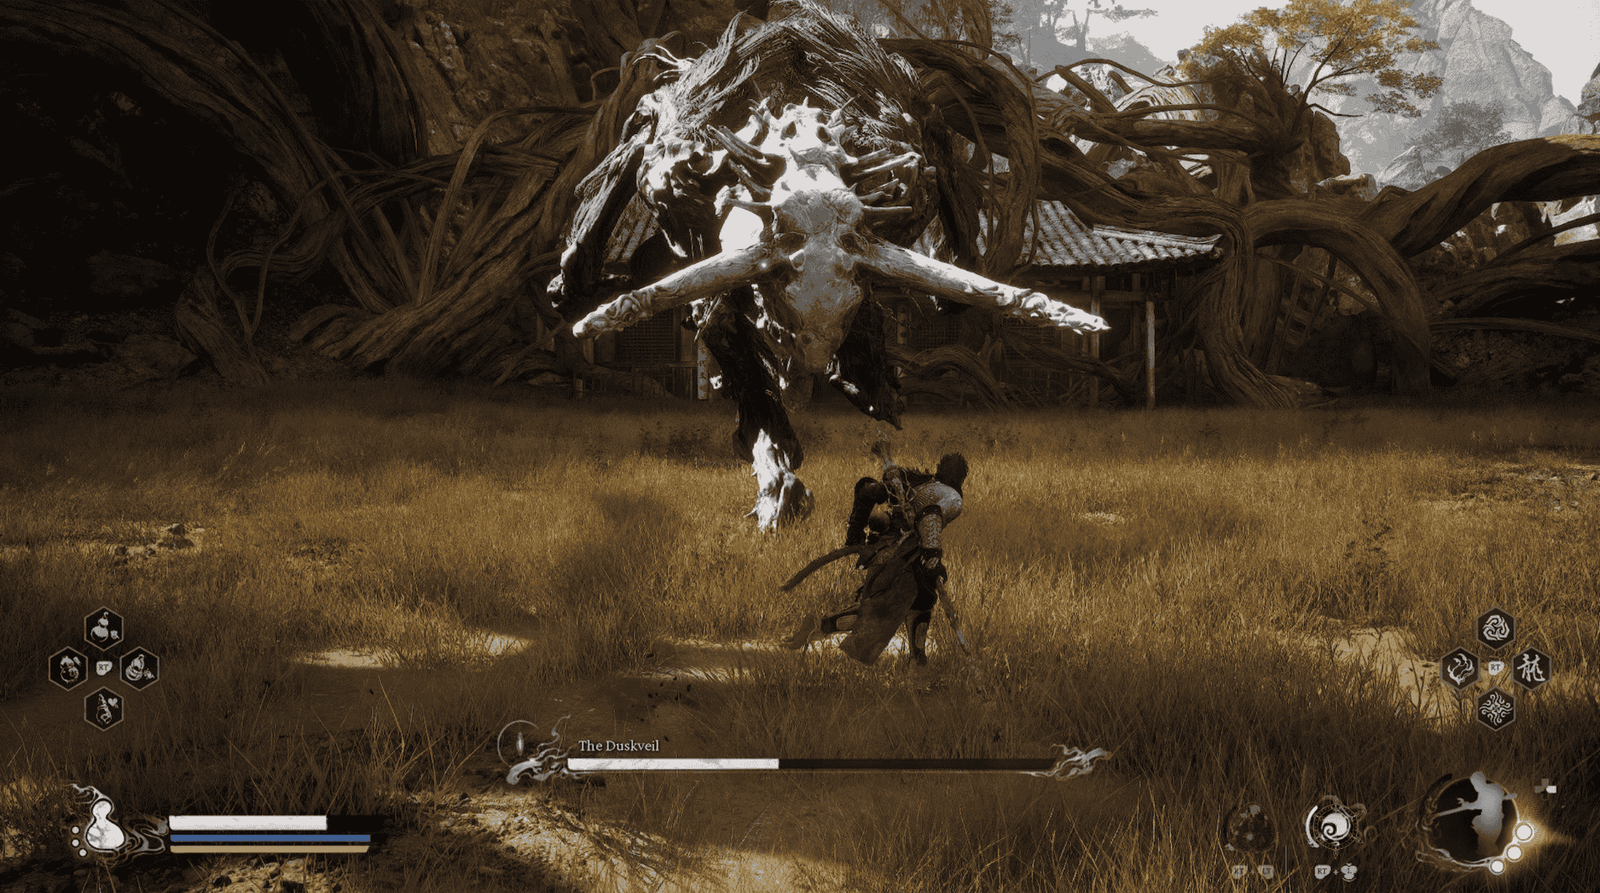
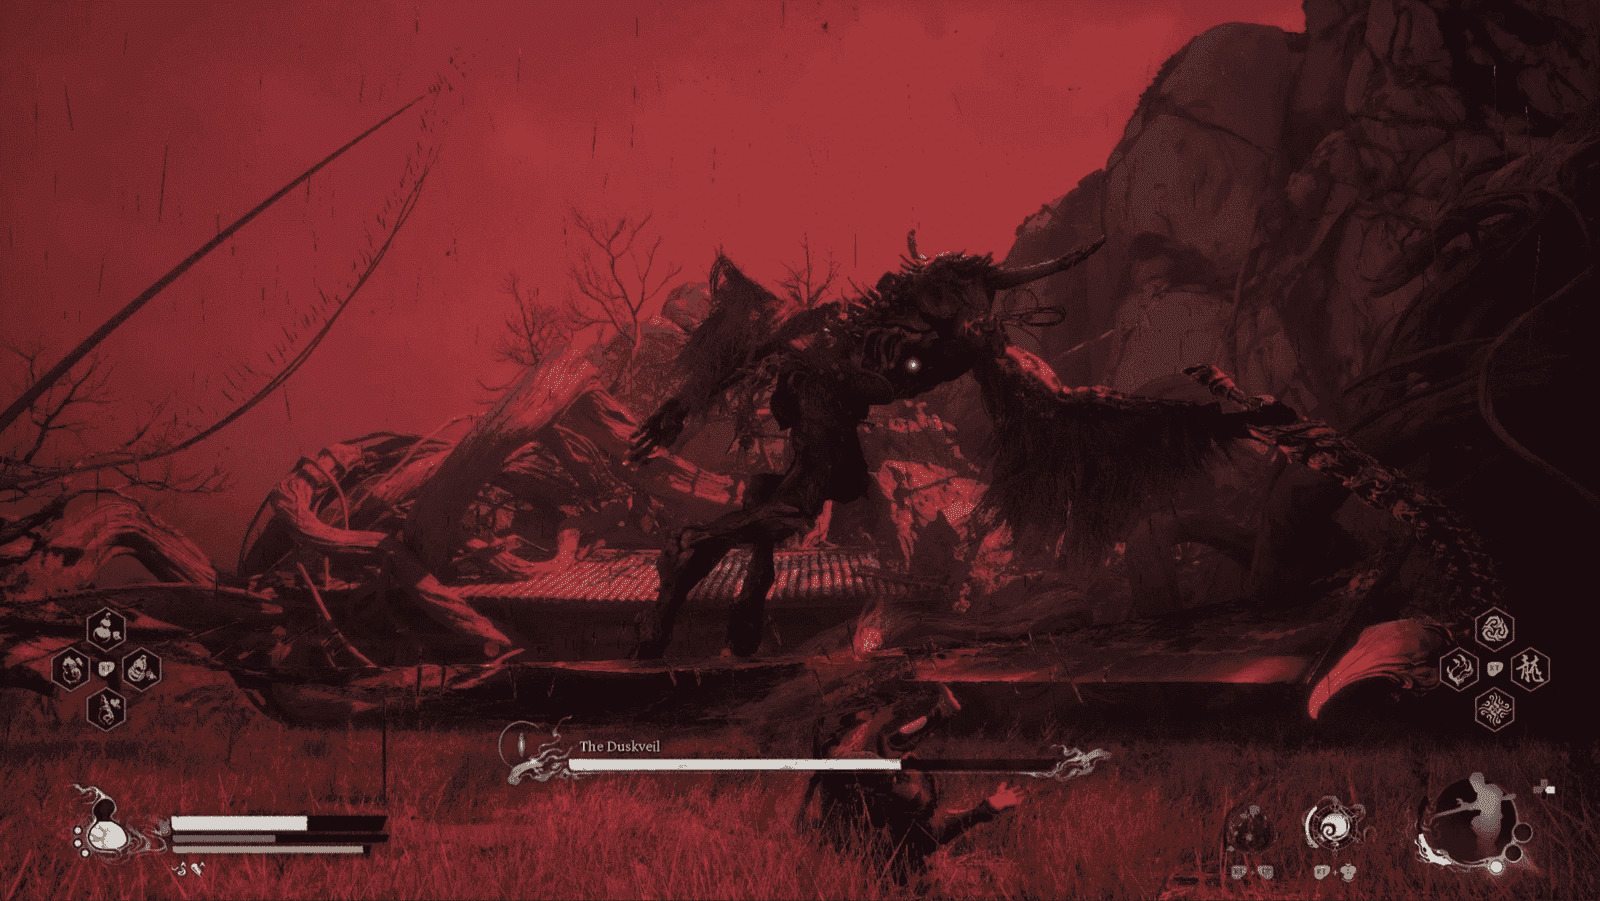
It’s time to face The Duskveil. This boss has two main phases, and although it starts with only about 75% health, don’t be complacent because it has a second health bar waiting for you.
Phase 1
In this phase, The Duskveil primarily acts like a giant, cursed rooster, with simple yet powerful attacks. Pay attention:
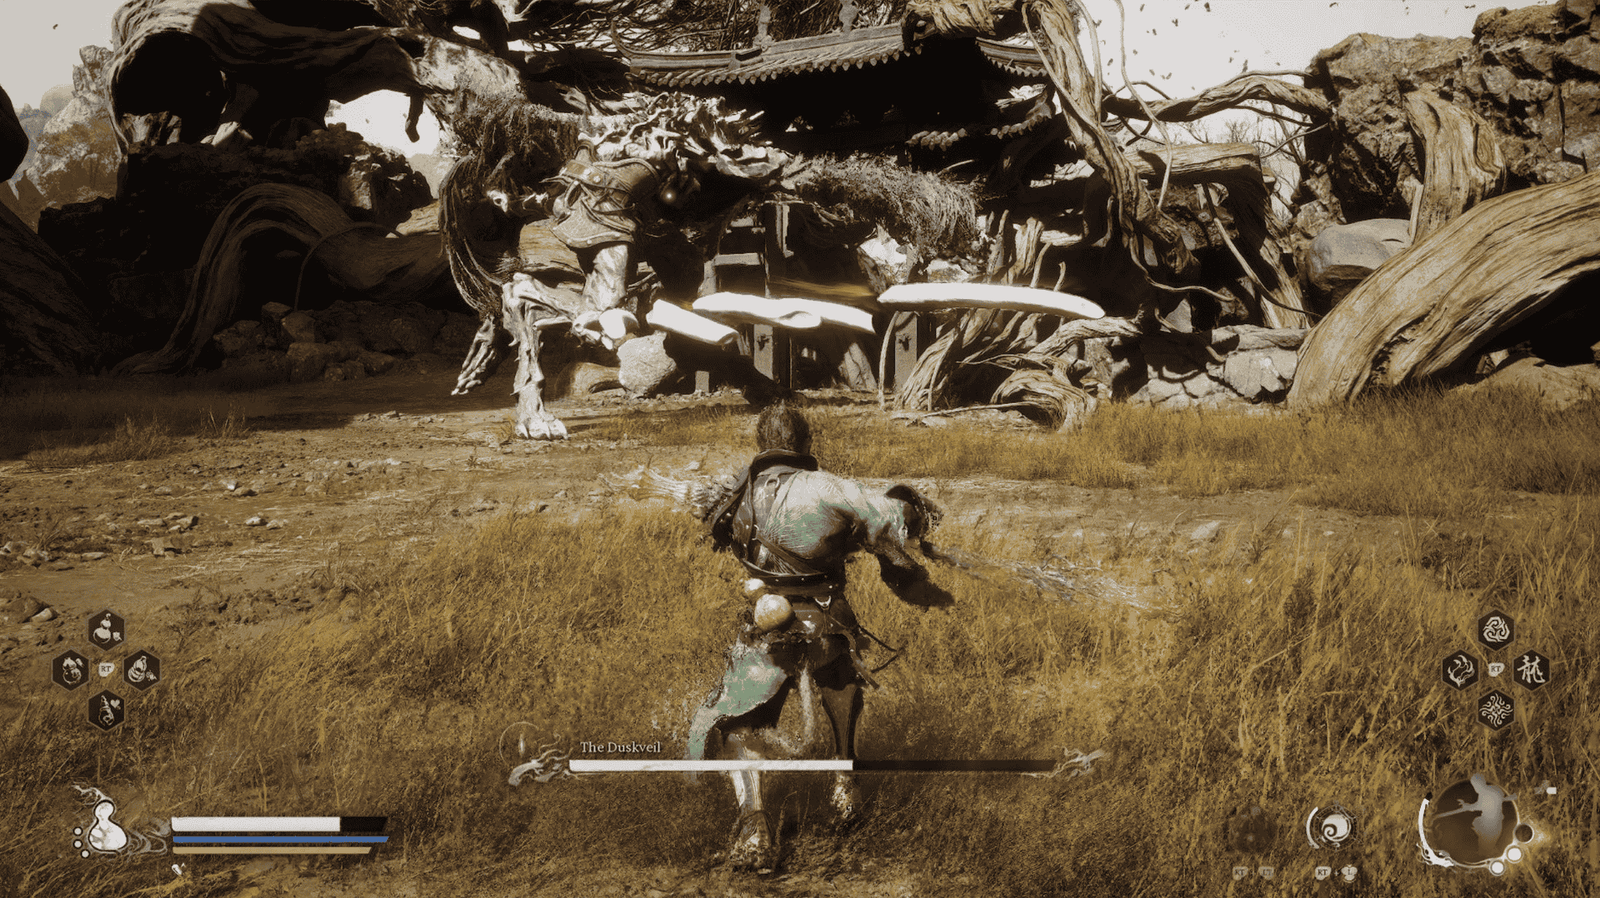
Jump and Kick/Roll: When at a distance, it might jump up, kick its feet towards you, then fall to the ground and roll violently. You need to dodge immediately if close, or wait for it to roll before dodging if far away.
Feather Projectiles: From afar, it can shoot a row of white feathers from its wings. This attack is quite easy to dodge or use staff spin to deflect.
Right Foot Stomp: If it lifts its right foot, prepare for a quick stomp. Afterward, it might fly backward or lower its head, wait a moment, then slam it hard onto the ground. This head slam provides a good counterattack opportunity. Both attacks can be parried.
Sweep Kick and Arm Swipes: It might lift its leg and slightly turn, then unleash a sweep kick. This is followed by two slow arm swipes in two directions. You only need to dodge once for each arm swipe, or use Rock Solid to push it back.
Spinning Aerial Attack: It can fly up, spinning its body into a multi-hit attack (only needs one dodge). Afterward, it will hover for a moment then stomp down hard with one foot. You need to practice the rhythm to dodge and counterattack.
Charge: Like a bull, it can charge at you continuously, up to 4 times. These charges can be parried or dodged. After the fourth charge, it will stagger, creating a great opportunity for you to deal damage.
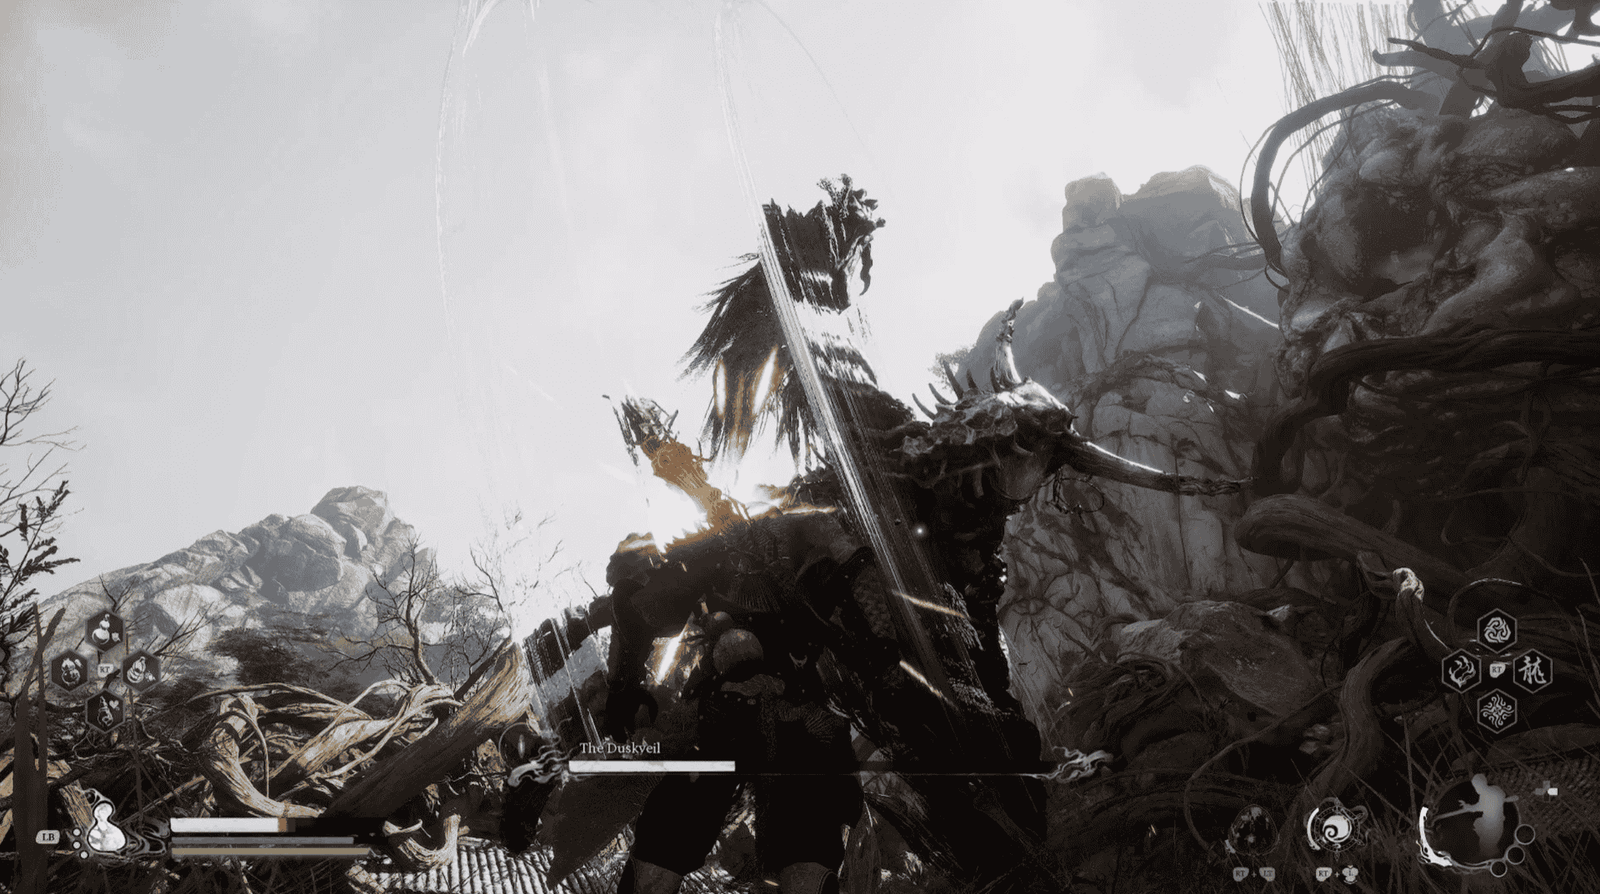
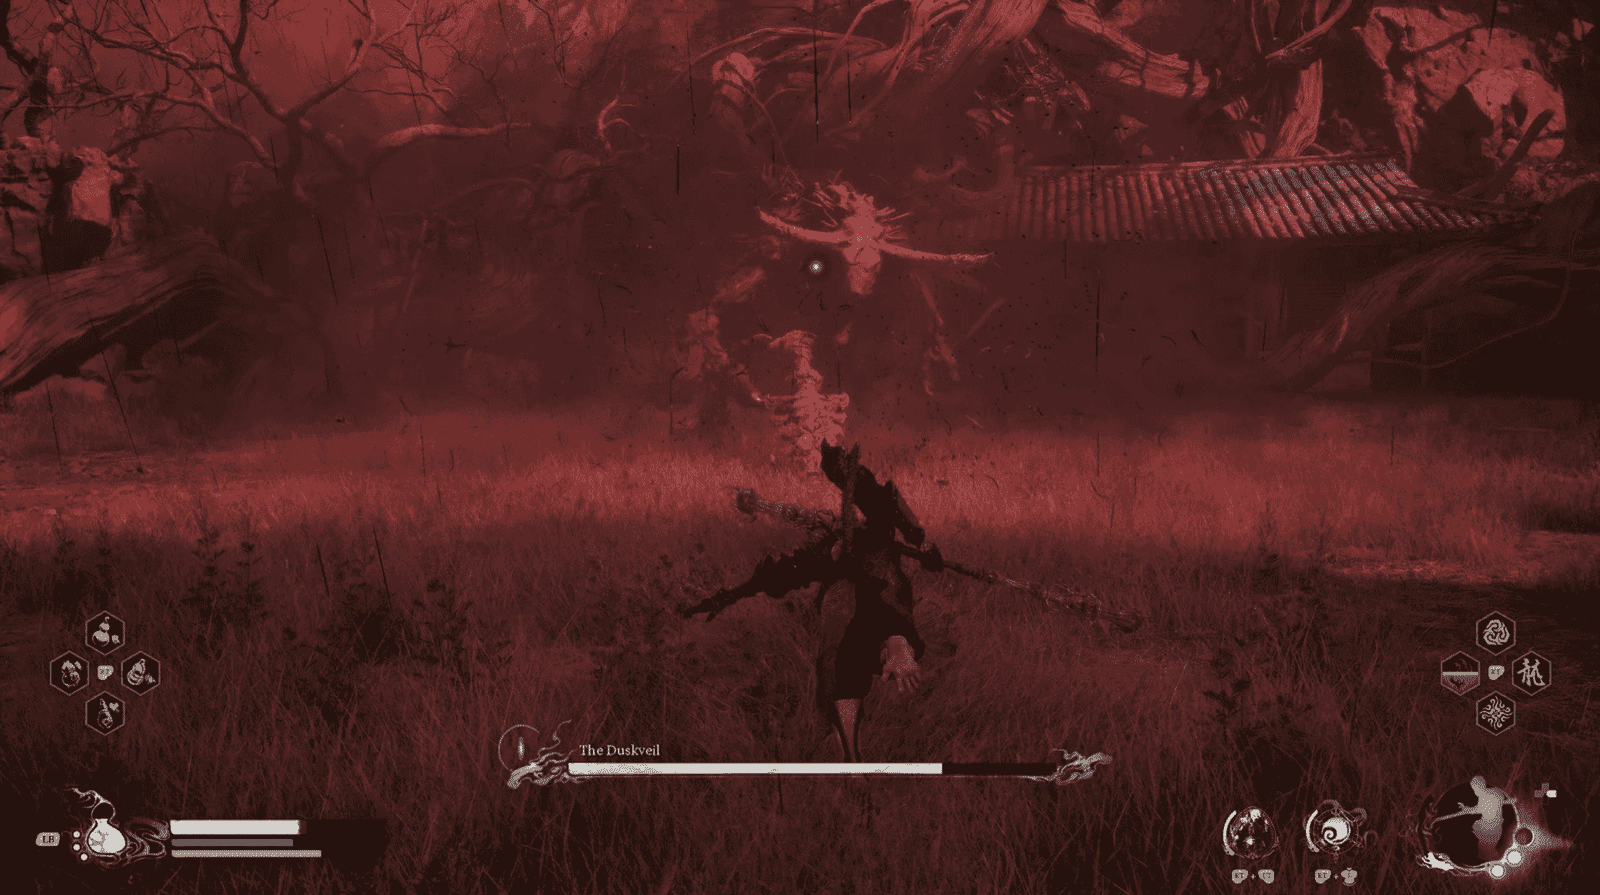
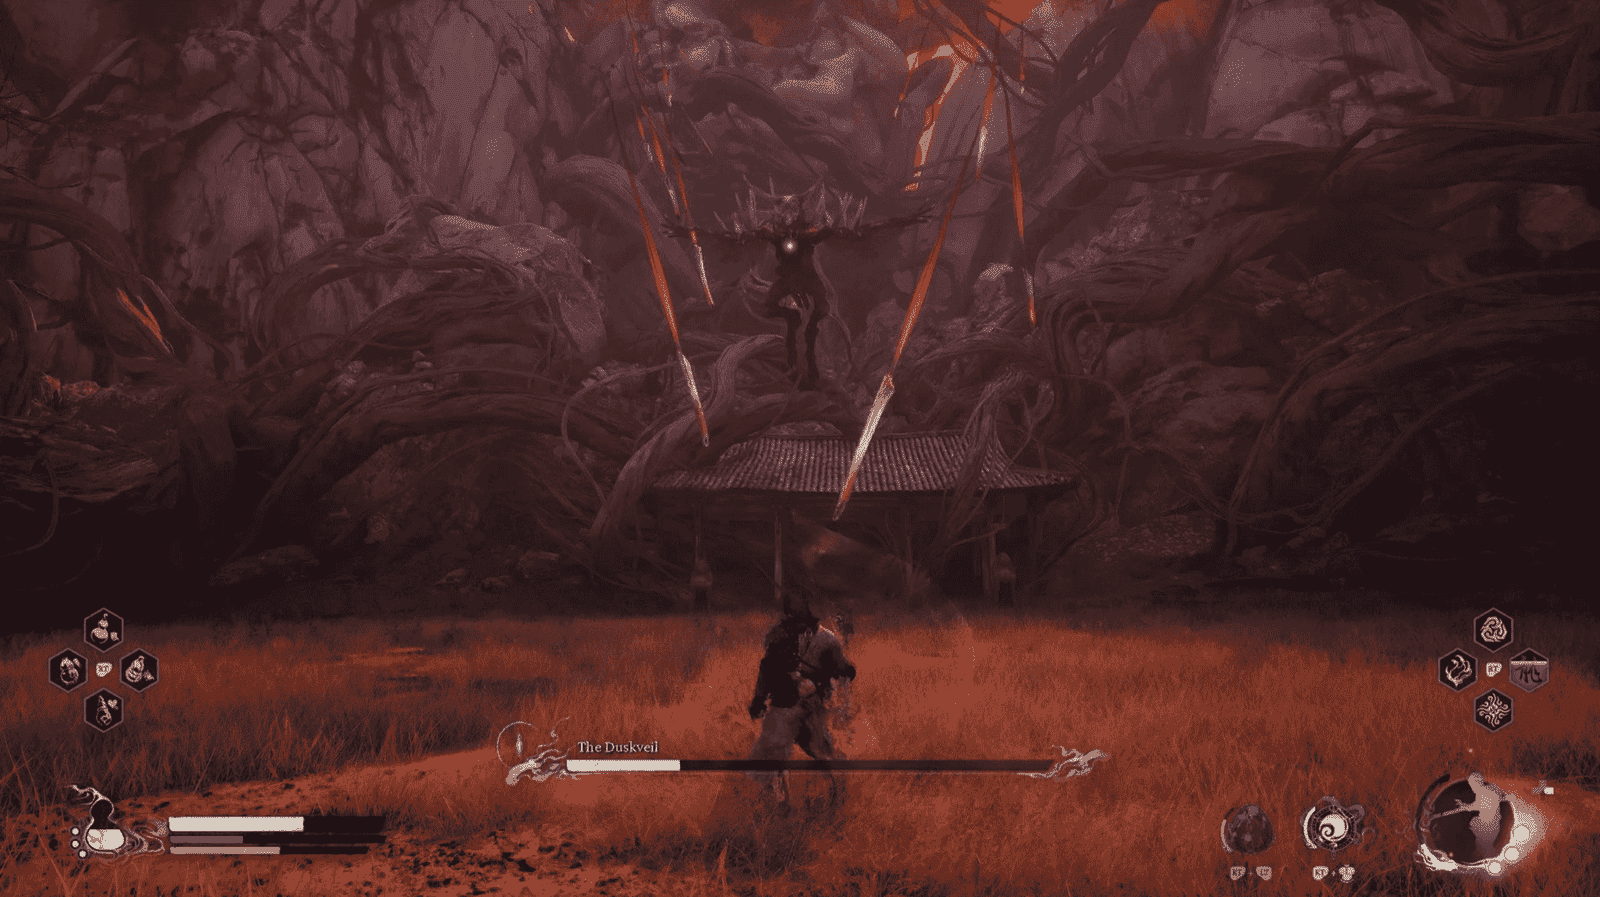
Phase 2 – Blood Moon
When the first health bar is depleted, the Blood Moon will appear, signaling the start of phase 2. The Duskveil becomes more aggressive and gains a new weapon: a bone sword pulled from its own mouth!
Drawing the Sword and Attacking: When it draws the sword from a distance, prepare for two types of attacks:
Ranged Slash: Slashes creating projectile slashes horizontally then diagonally, followed by flying up and slashing down with the sword.
Close Slash: Performs a similar spinning attack but uses the sword to slash directly twice, then flies up.
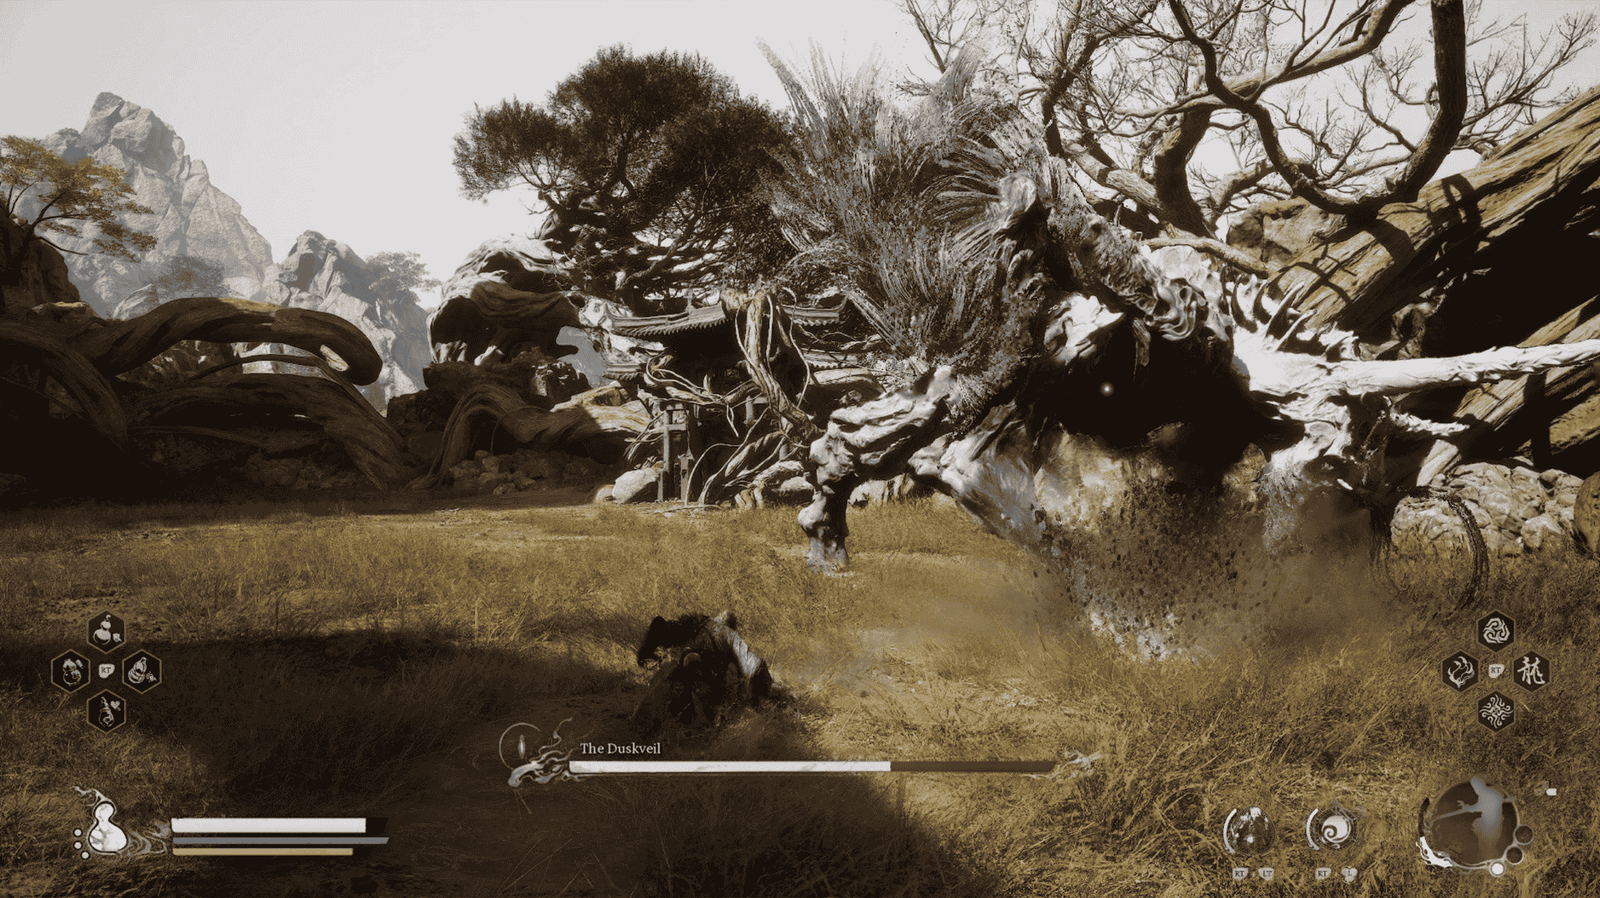
Sword Throw and Tremor Stomp: A variation of the close slash. After flying up, it throws the sword down, lands next to it, pauses slightly, then stomps hard on the sword, creating a massive tremor around it. Tip: As soon as it lands, switch to pillar stance and charge up to avoid the tremor and deliver a strong counterattack.

Blood Mist and Stab/Slash Through Mist: It can spew a blood mist that obscures vision. Retreating is the safe option. From within the mist, it can launch a quick left arm jab or draw its sword and stab it straight down into the ground in front. If it draws the sword and stabs the ground, after picking it back up, it will jump back and unleash a series of projectile slashes that need to be dodged sequentially. The rhythm is quite consistent, not too hard to dodge.
Upgraded Normal Attacks:
- The arm swipes can now be followed by drawing the sword and performing a spinning double slash, then transitioning into the sword throw tremor stomp.
- The jump stomp can now be repeated a second time, followed by flying up, drawing the sword, charging forward with a sweeping slash, and ending by stabbing the sword into the ground.
- The feather projectile attack can now be launched in two consecutive waves.
Death Crow: When it lets out a very loud crow, be careful!
- It will jump back, grow more bones, and shoot a barrage of bone projectiles focused on you. Can be dodged or deflected with staff spin (but costs a lot of stamina).
- Immediately after, it will fly up and shoot a continuous stream of bone projectiles in an arc. If stamina is low, run to the side to avoid.
- Tip: The loud crow provides enough time to completely interrupt the attack by hitting it with a charged attack or Spirit Attack.
Overall Strategy
- Exploit Openings: Always look for moments when The Duskveil pauses after major attacks to deal maximum damage.
- Use Resources: Don’t hesitate to use Spirit Attacks and Transformation Spells during phase 2 to end the fight faster.
- Patience is Key: Phase 2 might seem daunting, but once you recognize the sword-drawing cues and learn the rhythm of the new attacks, dodging becomes easier.
Master these moves and tactics, and you’ll soon send The Duskveil “demon chicken” back to hell!
Overcoming The Duskveil not only brings satisfaction but also rewards you with extremely valuable items, greatly aiding your journey ahead:
- Weaver’s Needle Vessel: This is the most brilliant reward! It slightly increases Critical Hit Chance and Critical Damage, extremely useful for optimizing your damage output. Notably, this vessel will be a great help when you face the final boss of Chapter 4 at the Temple of Yellow Flowers.
- Duskveil’s Horn: This rare horn is an essential component for completing the powerful Iron-Tough Armor Set.
- Double-Combed Rooster Blood: Soaked into the Gourd, this rooster blood will instantly cure the Poisoned State while significantly boosting movement speed and critical hit chance for a period – an excellent multi-purpose tool.
The Duskveil is indeed a formidable challenge atop Purple Cloud Mountain, requiring thorough preparation and flexible combat adaptation. However, by mastering its moves in both phases, making good use of equipment, skills, and the tips shared in this article, defeating this avian demon is entirely within your reach. The rewards obtained, especially the Weaver’s Needle Vessel and valuable materials, will be a worthy compensation for your efforts, paving the way for greater triumphs in the world of Black Myth: Wukong.
Don’t get discouraged if you fail the first few times. Practice patiently, observe carefully, and you will soon master this battle. Good luck defeating The Duskveil and continuing your exciting journey!